
🔐 Building SteganoVault: A Production-Grade Steganography Tool with Docker, Flask, MySQL, and Nginx
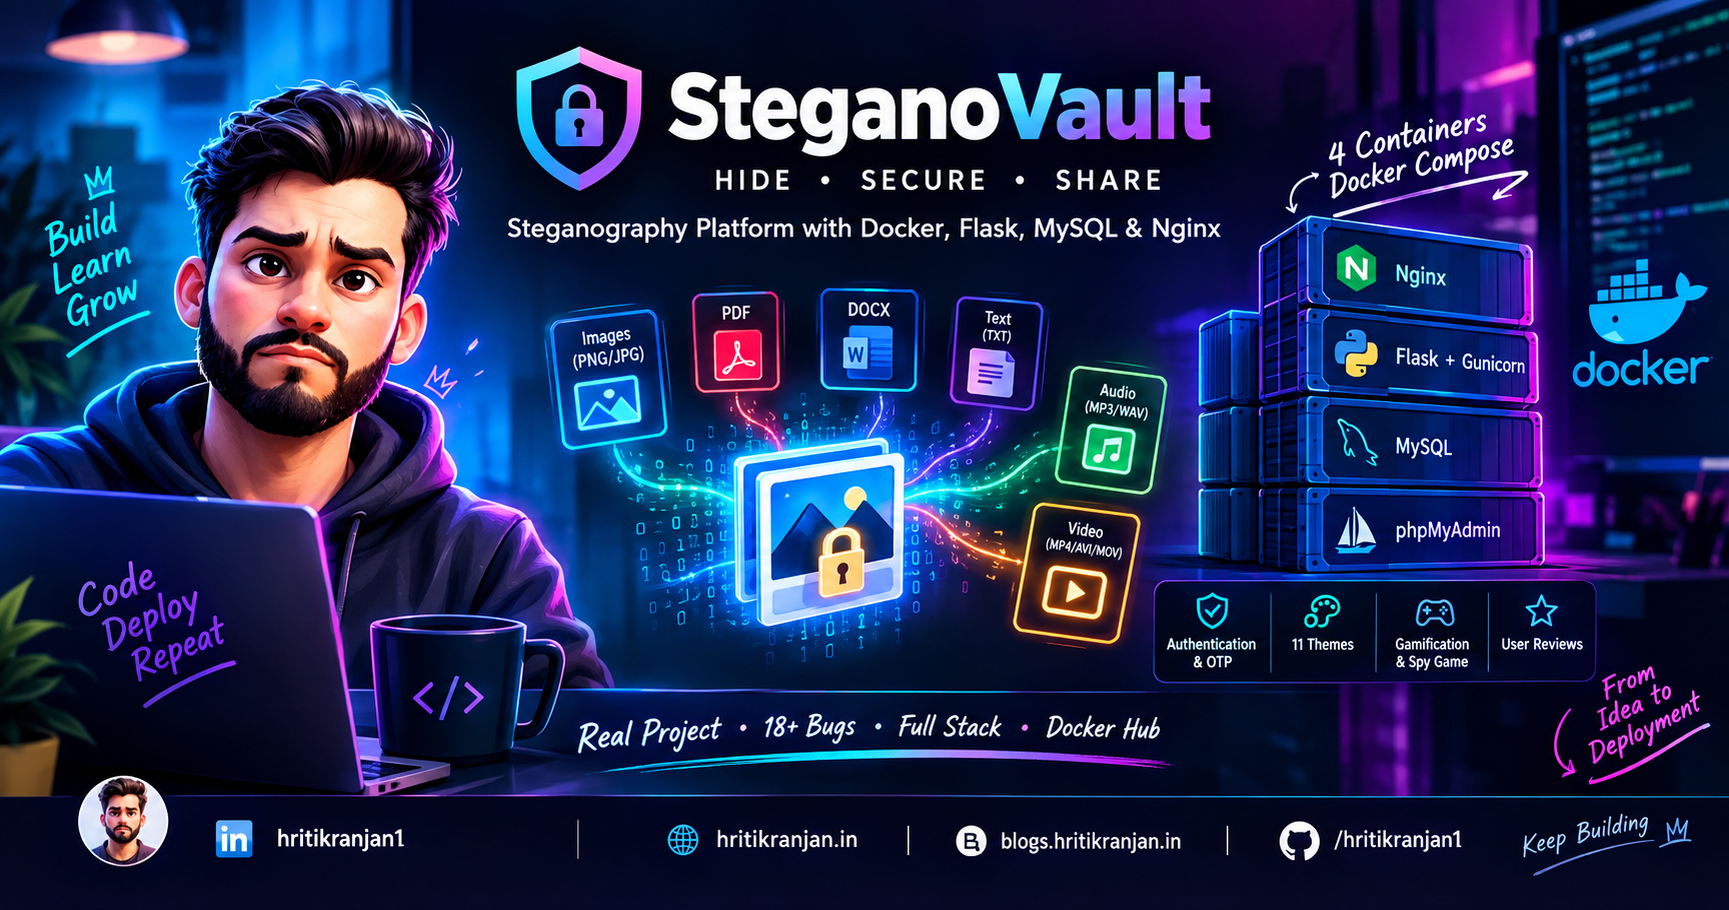
I built SteganoVault, a full-stack steganography platform that can hide secret messages inside images, text files, PDFs, DOCX documents, audio, and video. The application runs as a 4-container Docker Compose architecture using Flask, Gunicorn, MySQL, Nginx, and phpMyAdmin. Along the way, I worked with Docker networking, health checks, persistent volumes, reverse proxy configuration, Git, Docker Hub, image optimization, authentication, file processing, and frontend debugging. The interesting part was not just building the application. The interesting part was debugging it. I faced 18 real issues, including package compatibility problems, port conflicts, broken frontend files, browser caching, MySQL health-check failures, Docker Hub upload failures, IPv6 networking problems, OpenCV download failures, multi-stage Docker problems, health-check loops, and a 1.97 GB Docker image that I eventually reduced to 847 MB. This article documents the complete journey.
📚 Table of Contents
🚀 Introduction
A few months ago, I was comfortable writing backend applications with Python, Flask, and MySQL.
But Docker was a different story.
I knew the basic commands:
docker build
docker run
docker ps
But I wanted to understand what actually happens when a real application contains multiple services.
So instead of building another simple CRUD application, I decided to build something that would force me to learn more.
That project became SteganoVault.
The goal was simple:
Build a web application that can hide secret information inside normal-looking files and package the entire application using Docker.
But I didn't want it to stop at:
"It works on my laptop."
I wanted to understand:
How multiple containers communicate
How Docker Compose manages services
How Nginx works as a reverse proxy
How MySQL persists data
How health checks work
How containers wait for dependencies
How file-processing libraries behave inside containers
How to optimize Docker image size
How to push images to Docker Hub
How Git history should be maintained
How to debug a real multi-container application
The final project became much larger than I originally expected.
The application includes:
Flask backend
Gunicorn
MySQL 8.0
Nginx
phpMyAdmin
Docker Compose
Authentication
OTP verification
BCrypt password hashing
File steganography
Multiple file formats
11 UI themes
Gamification
Health checks
Persistent database storage
Docker Hub deployment
And most importantly:
18 real debugging problems.
Those problems taught me more than simply following a Docker tutorial.
🕵️ What is Steganography?
Before talking about Docker, let's understand the actual application.
Steganography is the technique of hiding information inside another piece of information so that the existence of the hidden information is difficult to notice.
For example, imagine you have a normal image:
vacation.jpg
It looks like an ordinary photograph.
But hidden inside that file could be:
Meet me at 8 PM.
A person viewing the image normally would not know that a secret message exists.
🔐 Steganography vs Cryptography
These two concepts are related but different.
| Feature | Cryptography | Steganography |
|---|---|---|
| Main goal | Hide the content | Hide the existence |
| Visible file | Usually obviously encrypted | Looks like a normal file |
| Example | Encrypted message | Secret message inside image |
| Main idea | Make information unreadable | Make information unnoticed |
Cryptography might transform:
Hello World
into something that looks like:
8f2a91c...
Steganography tries to keep the carrier file looking normal while hiding additional information inside it.
🧠 How SteganoVault Hides Information
SteganoVault uses different techniques depending on the file type.
Images and audio
The project uses the concept of LSB — Least Significant Bit.
The basic idea is that tiny changes to the least significant bits of pixels or samples are generally not noticeable to humans.
For example:
Original pixel:

10110110
can become:
10110111
Only the final bit changed.
When thousands or millions of pixels are involved, carefully changing selected bits can store information while keeping the visual difference extremely small.
Text files
The project uses invisible zero-width Unicode characters such as:
\u200B
\u200D
These characters are not normally visible when reading the text.
PDF, DOCX and video
The project also uses metadata or hidden-content techniques depending on the format.
The important thing to understand is that different file formats require different approaches.
🎯 Why I Built SteganoVault
I wanted a project that combined:
Backend
   +
Frontend
   +
Database
   +
File Processing
   +
Authentication
   +
Docker
   +
Networking
   +
DevOps
Steganography was a good choice because file processing naturally introduces additional challenges.
For example:
Images require Pillow/OpenCV
Audio requires audio-processing libraries
Video requires FFmpeg/OpenCV
PDFs require PDF libraries
DOCX requires document libraries
That means the Docker image also needs system-level dependencies.
This turned a simple Flask application into a real containerization challenge.
🎯 Project Overview
SteganoVault allows users to:
Upload a carrier file
Enter a secret message
Optionally provide a password
Encode the message
Download the resulting file
Share the encoded file
Upload it again later
Decode the hidden message
The basic workflow looks like this:
Carrier File
     +
Secret Message
     +
Optional Password
          │
          ▼
     SteganoVault
          │
          ▼
    Encoded File
          │
          ▼
       Download
          │
          ▼
     Upload Later
          │
          ▼
        Decode
          │
          ▼
   Original Message
✨ Main Features
1. Multiple File Formats
The application supports:
PNG
JPG/JPEG
TXT
PDF
DOCX
MP3
WAV
MP4
AVI
MOV
2. Optional Password Protection
Users can provide a password while encoding.
The project uses BCrypt for password hashing/authentication-related functionality.
3. Authentication
The project includes:
User registration
Login
Password hashing
OTP verification
Email functionality
4. 11 UI Themes
The application includes:
🌙 Dark
☀️ Light
💾 Cyberpunk
🕵️ Retro Spy
🌌 Neon Noir
📼 Vaporwave
⚙️ Steampunk
💻 Hacker Terminal
🌠 Cosmic Galaxy
🧘 Minimal Zen
📺 Glitchcore
Some themes include effects such as:
Grid animations
Code rain
Particles
Neon effects
Cyberpunk styling
5. Stealth Score
The application includes gamification.
Users can receive a stealth score and unlock badges.
6. Spy Target Practice
There is also a small spy-themed mini-game.
7. Reviews and Testimonials
The application includes user reviews/testimonials.
8. Docker Health Checks
The containers include health checks so Docker Compose can determine whether services are actually ready.
9. Persistent MySQL Storage
Database data is stored using a Docker named volume.
10. phpMyAdmin
A separate phpMyAdmin container provides a browser-based interface for managing the MySQL database.
🛠 Technology Stack
Backend
| Technology | Purpose |
|---|---|
| Python 3.10 | Core language |
| Flask 2.3 | Backend web framework |
| Gunicorn | Production WSGI server |
| MySQL 8.0 | Database |
| MySQL Connector | Database connectivity |
| BCrypt | Password hashing |
| Flask-Mail | OTP/email functionality |
| Stegano | LSB image steganography |
| PyPDF2 | PDF processing |
| python-docx | DOCX processing |
| Pydub | Audio processing |
| OpenCV | Video/image analysis |
| Mutagen | Media metadata |
| Pillow | Image processing |
🎨 Frontend
| Technology | Purpose |
|---|---|
| HTML5 | Page structure |
| CSS3 | Styling |
| JavaScript ES6+ | Application logic |
| Tailwind CSS | Utility styling |
| Font Awesome | Icons |
| EmailJS | Client-side email functionality |
🐳 DevOps Stack
| Technology | Purpose |
|---|---|
| Docker | Containerization |
| Docker Compose | Multi-container orchestration |
| Nginx | Reverse proxy/static files |
| phpMyAdmin | Database administration |
| Docker Hub | Container image registry |
| Git | Version control |
| GitHub | Source code hosting |
🏛 System Architecture
SteganoVault runs using four main containers:
                    ┌──────────────────────┐
                    │   🌐 Browser Client  │
                    │      localhost       │
                    └──────────┬───────────┘
                               │
                            HTTP :80
                               │
                               ▼
                    ┌──────────────────────┐
                    │     🔀 NGINX         │
                    │   Reverse Proxy      │
                    │                      │
                    │ Static Files         │
                    │ Gzip                 │
                    │ Upload Limit         │
                    └──────────┬───────────┘
                               │
                            :5000
                               │
                               ▼
                    ┌──────────────────────┐
                    │   🐍 Flask +         │
                    │      Gunicorn        │
                    │                      │
                    │ REST APIs            │
                    │ Authentication       │
                    │ Steganography        │
                    └──────────┬───────────┘
                               │
                            :3306
                               │
                               ▼
                    ┌──────────────────────┐
                    │    🗄️ MySQL 8.0     │
                    │                      │
                    │ users                │
                    │ OTP storage          │
                    │ reviews              │
                    └──────────┬───────────┘
                               │
                               ▼
                    ┌──────────────────────┐
                    │   💾 mysql-data      │
                    │    Docker Volume     │
                    └──────────────────────┘


                    ┌──────────────────────┐
                    │    🛠️ phpMyAdmin    │
                    │       :8081          │
                    └──────────┬───────────┘
                               │
                               ▼
                             MySQL
The source architecture defines the four services as Nginx, Flask/Gunicorn, MySQL, and phpMyAdmin, with MySQL using a persistent volume.
🔍 Component Overview
| Component | Port | Responsibility |
|---|---|---|
| Browser | — | User interface |
| Nginx | 80 | Reverse proxy/static files |
| Flask/Gunicorn | 5000 | Application/backend |
| MySQL | 3306 | Database |
| phpMyAdmin | 8081 | Database administration |
The important point is that the browser does not directly communicate with MySQL.
Instead:
Browser
   ↓
Nginx
   ↓
Flask
   ↓
MySQL
🔄 Request Flow
When a user opens:
http://localhost
the request reaches Nginx.
Nginx then decides what to do.
For static files:
Browser
   ↓
Nginx
   ↓
CSS / JavaScript / images
For application requests:
Browser
   ↓
Nginx
   ↓
Flask
For database operations:
Browser
   ↓
Nginx
   ↓
Flask
   ↓
MySQL
🐳 Docker Networking
This was one of the most important Docker concepts I learned.
Inside a Docker Compose network, containers communicate using service names.
For example:
Flask → mysql:3306
Nginx → web:5000
phpMyAdmin → mysql:3306
You should not normally use:
localhost
for container-to-container communication.
Why?
Because inside a container:
localhost
means:
This current container.
It does not mean:
Another container.
Docker Compose provides internal DNS resolution for service names.
So if the database service is named:
mysql:
the Flask container can connect to:
mysql:3306
💾 Database and Persistent Storage
MySQL uses a Docker volume:
mysql-data
The flow is:
MySQL Container
      │
      ▼
mysql-data Volume
      │
      ▼
Persistent Database Storage
This means if the MySQL container is recreated, the database data can remain available as long as the volume is preserved.
This is an important difference between:
docker compose down
and:
docker compose down -v
The second command removes volumes.
So:
docker compose down
is safer when you want to stop the stack without deleting database data.
🔐 Security and Performance
Several design decisions were made to make the application more realistic.
Nginx
Nginx is the public-facing entry point.
Gunicorn
Instead of using Flask's development server, the application runs through Gunicorn.
The configured setup uses:
2 workers
×
2 threads
BCrypt
Passwords are hashed instead of storing them as plain text.
OTP
OTP verification provides an additional authentication step.
Gzip
Nginx can compress text-based responses.
Upload Size
The Nginx configuration supports uploads up to approximately:
100 MB
Persistent Database
MySQL data is stored in a named volume.
🤔 Why Nginx?
You might ask:
Why not expose Flask directly?
Nginx gives us an additional layer between the user and application server.
It can handle:
Reverse proxying
Static files
Compression
Request headers
Upload limits
Future HTTPS termination
Future load balancing
So instead of:
Browser → Flask
we have:
Browser → Nginx → Flask
🤔 Why Gunicorn?
Flask's built-in development server is designed for development.
For this project, Gunicorn is used as the WSGI server.
The architecture uses:
Gunicorn
2 workers
2 threads per worker
This provides a more production-oriented execution model.
🤔 Why MySQL?
PostgreSQL could also have worked.
I selected MySQL because:
It supports ACID transactions
MySQL 8 provides JSON functionality
utf8mb4 is supported
phpMyAdmin integrates naturally
It is widely used
It is familiar for beginners
🔄 Complete Application Workflow
Let's now follow the application from startup to user request.
Phase 1 — Docker Startup
When we execute:
docker compose up -d
Docker starts the services.
The basic sequence is:
Docker Compose
      │
      ▼
MySQL
      │
      ▼
MySQL Health Check
      │
      ▼
Flask/Web
      │
      ▼
Flask Health Check
      │
      ▼
Nginx
      │
      ▼
Application Ready
phpMyAdmin also starts and connects to MySQL.
🗄️ MySQL Startup
MySQL:
Starts the container
Initializes its data directory
Executes the initialization SQL
Creates application tables
Seeds required data
Starts its health check
The project uses an initialization file:
init-db/init.sql
❤️ Health Checks
Health checks were one of the important DevOps parts of the project.
For MySQL, a simple check is:
healthcheck:
  test: ["CMD", "mysqladmin", "ping", "-h", "localhost"]
This checks whether MySQL is responding.
The Flask service has a health endpoint:
/health
Nginx waits for the web service to become ready.
This avoids treating:
container started
as the same thing as:
application ready
That distinction becomes very important in multi-container applications.
🔐 Encoding Workflow
Now let's follow an actual encoding request.
Suppose the user wants to hide:
My first secret
inside an image.
The browser sends:
File
Message
Password
using multipart form data.
Step 1 — Browser
The JavaScript creates:
const formData = new FormData();

formData.append('file', file);
formData.append('message', message);
formData.append('password', password);

const response = await fetch('/encode', {
    method: 'POST',
    body: formData
});
Step 2 — Nginx
The request reaches Nginx on:
Port 80
Nginx:
Receives the request
Checks request limits
Adds forwarding headers
Sends the request to the web container
The request becomes:
Nginx :80
    ↓
web :5000
Step 3 — Gunicorn
Gunicorn receives the request.
One of the workers handles it.
The request reaches Flask.
Step 4 — Flask
A simplified version of the endpoint looks like:
@app.route("/encode", methods=["POST"])
def encode():
    uploaded_file = request.files["file"]

    message = request.form.get("message")
    password = request.form.get("password", "")

    filename = secure_filename(uploaded_file.filename)

    temp_dir = tempfile.mkdtemp()

    file_path = os.path.join(
        temp_dir,
        filename
    )

    uploaded_file.save(file_path)

    ext = os.path.splitext(file_path)[1].lower()

    if ext in [".png", ".jpg", ".jpeg"]:
        output_file = encode_image(
            file_path,
            message,
            password
        )

    return send_file(
        output_file,
        as_attachment=True
    )
The actual project contains considerably more processing and validation, but this shows the basic idea.
Step 5 — Steganography Engine
For an image, the application prepares the secret message.
For example:
secret_message = (
    f"{password}:{message}"
    if password
    else message
)
Then the image is processed.
JPEG files can introduce compression changes that are unsuitable for simple LSB storage, so the image can be converted to PNG before encoding.
Conceptually:
encoded_img = lsb.hide(
    input_path,
    secret_message
)
The resulting file is saved.
Step 6 — Response
The backend sends the encoded file back.
Conceptually:
HTTP/1.1 200 OK
Content-Type: image/png
Content-Disposition: attachment
Additional metadata can be associated with the response.
Step 7 — Browser
The browser receives the file as a Blob.
JavaScript can then trigger the download.
const blob = await response.blob();

const url = URL.createObjectURL(blob);

const a = document.createElement("a");

a.href = url;
a.download = metadata.filename;

a.click();
The user now has the encoded file.
🔓 Decoding Workflow
The decoding process is basically the reverse.
Encoded File
     │
     ▼
Browser
     │
     ▼
Nginx
     │
     ▼
Flask
     │
     ▼
Steganography Engine
     │
     ▼
Hidden Message
For example:
Encoded Image
       +
Password
       ↓
     Decode
       ↓
"My first secret"
📊 Complete Data Flow
                 USER INPUT
                     │
          ┌──────────┼──────────┐
          │          │          │
        File       Message    Password
          │          │          │
          └──────────┼──────────┘
                     │
                     ▼
                NGINX :80
                     │
                     ▼
               Flask :5000
                     │
           ┌─────────┴─────────┐
           │                   │
           ▼                   ▼
   Temporary Files      Database Access
           │                   │
           ▼                   ▼
   Steganography             MySQL
           │
           ▼
      Output File
           │
           ▼
        Browser
           │
           ▼
        Download
📁 Project Structure
The project contains application code, Docker configuration, Nginx configuration, scripts, documentation, and database initialization.
SteganoVault/
│
├── app.py
├── requirements.txt
├── Dockerfile
├── docker-compose.yml
│
├── .env.example
├── .dockerignore
├── .gitignore
│
├── LICENSE
├── README.md
│
├── USER_GUIDE.md
├── ARCHITECTURE.md
├── WORKFLOW.md
├── ISSUES.md
├── INTERVIEW_QA.md
│
├── init-db/
│   └── init.sql
│
├── nginx/
│   ├── nginx.conf
│   └── conf.d/
│       └── default.conf
│
├── scripts/
│   └── entrypoint.sh
│
├── templates/
│   └── index.html
│
├── static/
│   ├── css/
│   │   ├── style.css
│   │   └── tailwind.min.css
│   │
│   ├── js/
│   │   └── app.js
│   │
│   └── screenshots/
│
├── logs/
│
└── tmp/
📚 Documentation Files
I also created separate documentation files:
USER_GUIDE.md
Beginner-friendly setup instructions.
ARCHITECTURE.md
Detailed architecture and design decisions.
WORKFLOW.md
Complete application and container workflow.
ISSUES.md
The real debugging journey and fixes.
INTERVIEW_QA.md
Interview questions and answers based on the project.
This was useful because the project became large enough that keeping everything only inside README.md was not practical.
🚀 Prerequisites
Before starting, install:
Docker 20.10+
Docker Compose v2+
Git
Minimum 4 GB RAM
Recommended 8 GB RAM
Around 5 GB free disk space
For Docker installation, use the official Docker documentation.
Step 1 — Clone the Repository
Clone the project:
git clone https://github.com/hritikranjan1/SteganoVault-Docker.git
Move into the project:
cd SteganoVault-Docker
Step 2 — Configure Environment Variables
Copy the example file:
cp .env.example .env
Open it:
nano .env
Example configuration:
SECRET_KEY=change-this-to-a-random-string-min-32-chars
FLASK_ENV=production

MYSQL_ROOT_PASSWORD=rootpassword123
MYSQL_DATABASE=steganovault
MYSQL_USER=stegano
MYSQL_PASSWORD=stegano123

MAIL_SERVER=smtp-relay.brevo.com
MAIL_PORT=587
MAIL_USE_TLS=true
MAIL_USERNAME=
MAIL_PASSWORD=
MAIL_DEFAULT_SENDER=noreply@steganovault.com

GOOGLE_DRIVE_FOLDER_ID=
GOOGLE_CREDENTIALS=
Important
Do not commit:
.env
to Git.
Environment variables can contain:
Passwords
API keys
Secret keys
Database credentials
Email credentials
Step 3 — Generate a Secret Key
Instead of using a weak secret key, generate one.
Run:
python3 -c "import secrets; print(secrets.token_hex(32))"
Example output:
a-long-random-secret-value
Copy that value into:
SECRET_KEY=
Step 4 — Build the Docker Images
Run:
docker compose build
Or build and start everything together:
docker compose up -d --build
The first build can take several minutes because the application requires system packages and Python dependencies such as:
FFmpeg
OpenCV
Pillow
Audio libraries
Database libraries
Step 5 — Start the Application
Run:
docker compose up -d
To watch logs:
docker compose logs -f
Or:
docker compose logs -f web
Step 6 — Verify Containers
Run:
docker compose ps
Expected output will look similar to:
NAME                       STATUS
steganovault-mysql         Up (healthy)
steganovault-nginx         Up (healthy)
steganovault-phpmyadmin    Up
steganovault-web           Up (healthy)
Ports:
MySQL        → 3306
Nginx        → 80
phpMyAdmin   → 8081
Flask        → 5000 internally
Step 7 — Check the Health Endpoint
Run:
curl http://localhost/health
For formatted JSON:
curl http://localhost/health | python3 -m json.tool
A healthy response looks similar to:
{
    "status": "healthy",
    "timestamp": "2026-09-29T12:00:00.000000",
    "version": "1.0.0",
    "services": {
        "database": "healthy",
        "api": "healthy"
    }
}
Step 8 — Open the Application
Open:
http://localhost
phpMyAdmin:
http://localhost:8081
Health endpoint:
http://localhost/health
MySQL:
localhost:3306
Step 9 — Test Encoding
Let's perform the first encoding test.
1. Open the application
http://localhost
2. Upload an image
Use:
PNG
or:
JPG
3. Enter a message
For example:
My first secret
4. Enter a password
For example:
test123
5. Click Encode
The application processes the image.
6. Download the resulting file
The encoded image should download automatically.
Step 10 — Test Decoding
Now upload the encoded file.
Enter:
test123
Click:
Decode
The application should display:
My first secret
If this works, the complete encode/decode pipeline is functioning.
Step 11 — Explore the Themes
Open the theme selector.
You can try:
🌙 Dark
☀️ Light
💾 Cyberpunk
🕵️ Retro Spy
🌌 Neon Noir
📼 Vaporwave
⚙️ Steampunk
💻 Hacker Terminal
🌠 Cosmic Galaxy
🧘 Minimal Zen
📺 Glitchcore
The theme system uses CSS variables and custom animations.
🐳 Useful Docker Commands
Start everything
docker compose up -d
Start and rebuild
docker compose up -d --build
Stop containers
docker compose down
This normally preserves the named volume.
Stop and delete volumes
docker compose down -v
⚠️ Be careful.
This can delete persistent database data.
Restart the web container
docker compose restart web
View web logs
docker compose logs -f web
View all logs
docker compose logs -f
Enter the web container
docker compose exec web bash
Check application health
curl http://localhost/health
Enter MySQL
docker compose exec mysql \
mysql -u stegano -pstegano123 steganovault
🌿 Git Workflow
Building the application was only one part of the project.
I also wanted to maintain a proper Git repository.
Initialize Git:
git init
Set the main branch:
git checkout -b main
Configure Git:
git config user.name "Hritik Ranjan"
git config user.email "your-email@example.com"
.gitignore
A .gitignore file is extremely important.
Example:
.env
.env.local

__pycache__/
*.py[cod]

venv/
env/
.venv/

.idea/
.vscode/
*.swp

.DS_Store
Thumbs.db

logs/*.log
*.log

tmp/*
static/*_preview.*
static/*_encoded.*

*.backup
*.bak

multi-commit.sh
One of the lessons from this project was:
Never commit secrets.
Especially:
.env
📝 Creating Meaningful Commits
I wanted the repository to show real development history.
The project eventually had a large number of commits.
The important lesson here is not the number of commits.
The important lesson is:
Commits should represent meaningful changes.
Examples:
feat(backend): implement encode endpoint
fix(mysql): simplify database health check
fix(frontend): restore corrupted JavaScript
docs: add architecture documentation
docs: expand debugging issues
⚠️ Important Lesson About Commit Scripts
I created a custom script for generating commits.
That introduced one of the worst problems in the project.
The script used commands like:
cat > file << EOF
and:
sed -i
Those commands unintentionally modified application source files.
This resulted in:
Truncated
app.pyBroken
index.htmlIncorrect
app.jsMissing CSS
So a script intended to manage Git history ended up modifying the application itself.
The safer approach for empty commits was:
git commit --allow-empty -m "fix: resolve edge case"
The major lesson:
Test automation scripts on a copy of the repository before running them on the real project.
🔐 GitHub Authentication
When pushing to GitHub, password authentication may not work depending on your account configuration.
One option is a Personal Access Token.
Another option is SSH.
Generate an SSH key:
ssh-keygen -t ed25519 -C "your-email@example.com"
Display the public key:
cat ~/.ssh/id_ed25519.pub
Add it to your GitHub SSH keys.
Then configure the remote:
git remote set-url origin git@github.com:hritikranjan1/SteganoVault-Docker.git
📦 Pushing the Project to GitHub
Add the remote:
git remote add origin \
https://github.com/hritikranjan1/SteganoVault-Docker.git
Verify:
git remote -v
Push:
git push -u origin main
🐳 Docker Hub Deployment
After GitHub, I wanted the Docker image available through Docker Hub.
This introduced another major learning experience.
Step 1 — Login to Docker Hub
Run:
docker login
Enter your Docker Hub username.
If using a Personal Access Token:
Username: hritikranjan1
Password: <your-token>
Step 2 — Create Docker Hub Repository
Create a repository named:
steganovault
Example image name:
hritikranjan1/steganovault
Step 3 — Tag the Image
First check the image:
docker images
Then tag it:
docker tag \
steganovault-web:latest \
hritikranjan1/steganovault:latest
You can also create a version tag:
docker tag \
steganovault-web:latest \
hritikranjan1/steganovault:v1.0.0
Step 4 — Push
Run:
docker push hritikranjan1/steganovault:latest
And this is where things became interesting.
😵 Docker Hub Push Failure
The image was approximately:
1.97 GB
The network upload speed was around:
2 Mbps
During the push, Docker reported an error similar to:
failed to copy:
failed to do request:
write tcp ...:
use of closed network connection
The upload repeatedly failed.
🔁 First Attempt — Retry
I tried:
docker push hritikranjan1/steganovault:latest
Again.
And again.
The upload would get partway through and fail.
🔁 Second Attempt — Retry Loop
I created a simple retry loop:
for i in {1..15}; do
    docker push hritikranjan1/steganovault:latest && break
    sleep 15
done
This sometimes allowed the upload to progress further.
But there was still a larger problem.
The image was simply too large.
🌐 IPv6 Networking Problem
While investigating the error, I noticed IPv6 addresses in the connection error.
I tested IPv4:
curl -4 -I https://registry-1.docker.io/v2/
and IPv6:
curl -6 -I https://registry-1.docker.io/v2/
IPv4 was stable while IPv6 was intermittent in my environment.
🔧 IPv6 Fix
I temporarily disabled IPv6:
sudo sysctl -w net.ipv6.conf.all.disable_ipv6=1
sudo sysctl -w net.ipv6.conf.default.disable_ipv6=1
Then restarted Docker:
sudo systemctl restart docker
Docker could then use IPv4 more reliably.
The project notes specifically record this as one of the Docker Hub networking issues and recommend comparing curl -4 and curl -6 when investigating similar failures.
📉 Docker Image Optimization
But fixing IPv6 was not enough.
The image was still:
1.97 GB
That is a huge image for a Flask application.
So I investigated where the size was coming from.
🔍 Using docker history
I ran:
docker history steganovault-web:latest \
--no-trunc \
--human
This showed the size of individual Docker layers.
I also checked Python packages:
docker compose exec web \
du -sh /usr/local/lib/python3.10/site-packages/* \
| sort -h \
| tail -10
This helped identify the largest dependencies.
📊 Where the Size Came From
Some major contributors were:
| Component | Approx. Size | Needed? |
|---|---|---|
| Python slim base | 150 MB | Yes |
| FFmpeg | 200 MB | Yes |
| OpenCV packages | 112 MB | Partially |
| NumPy | 60 MB | Yes |
| Google dependencies | 80 MB | Optional |
| GCC/G++/pkg-config | 250 MB | Build only |
| MySQL development packages | 100 MB | Build only |
| Cache/tests/metadata | ~100 MB | No |
The biggest lesson was that some packages required to build the application did not need to remain in the final runtime environment.
🧹 Removing Build Dependencies
The Dockerfile was changed to install build tools, install Python packages, clean unnecessary files, and then remove the build tools.
For example:
FROM python:3.10-slim

RUN apt-get update && apt-get install -y --no-install-recommends \
    ffmpeg \
    libgl1 \
    libglib2.0-0 \
    libgomp1 \
    libmariadb3 \
    libsm6 \
    libxext6 \
    libxrender1 \
    libsndfile1 \
    curl \
    gcc \
    g++ \
    pkg-config \
    default-libmysqlclient-dev \
    && rm -rf /var/lib/apt/lists/*

COPY requirements.txt .

RUN pip install --no-cache-dir --upgrade pip && \
    pip install --no-cache-dir -r requirements.txt && \
    find /usr/local/lib/python3.10 \
        -name "__pycache__" \
        -type d \
        -exec rm -rf {} + 2>/dev/null || true && \
    find /usr/local/lib/python3.10 \
        -name "*.pyc" \
        -delete 2>/dev/null || true && \
    find /usr/local/lib/python3.10 \
        -name "tests" \
        -type d \
        -exec rm -rf {} + 2>/dev/null || true

RUN apt-get purge -y \
    gcc \
    g++ \
    pkg-config \
    default-libmysqlclient-dev && \
    apt-get autoremove -y && \
    rm -rf /var/lib/apt/lists/*
🎉 Final Result
The image went from:
1.97 GB
to:
847 MB
That's approximately a:
57% reduction
The project source records the same result after removing build-time dependencies, duplicate packages, caches, tests, and unnecessary metadata.
This was a major improvement.
A smaller image means:
Faster builds
Faster pushes
Faster pulls
Faster deployments
Less storage
Less network traffic
🐛 All 18 Problems I Faced
This was probably the most valuable part of the entire project.
Instead of hiding the failures, I documented them.
❌ Issue 1 — Debian Package Compatibility
Problem
Docker build failed with:
Package libgl1-mesa-glx is not available
ERROR: exit code: 100
Root Cause
The Python slim image changed its underlying Debian version and some package names were no longer available.
Fix
Instead of:
libgl1-mesa-glx
libxrender-dev
the project used:
libgl1
libxrender1
The broader lesson was to avoid relying blindly on moving package names and to pin base-image versions when reproducibility matters.
❌ Issue 2 — Port 8080 Already in Use
Problem
Docker reported:
failed to bind host port 0.0.0.0:8080/tcp:
address already in use
Root Cause
An older phpMyAdmin container was still using the port.
Debug
docker ps -a | grep phpmyadmin
Fix
Stop the old container:
docker stop <container_id>
Or change the port:
phpmyadmin:
  ports:
    - "8081:80"
The project ultimately used port 8081.
❌ Issue 3 — Frontend CSS and JavaScript Not Loading
Problem
The application loaded as plain HTML.
The browser console also showed JavaScript errors.
Root Cause
The CSS file was empty and app.js contained incorrect/old content.
Debug
wc -l static/css/style.css
It returned:
0
I also checked:
head -5 static/js/app.js
Fix
Restored the CSS
Restored JavaScript
Restarted the container
Verified files again
Lesson
Never assume the file on disk contains what you expect.
Useful commands:
head
cat
wc -l
❌ Issue 4 — Browser Caching Static Files
Problem
I changed CSS but the browser continued showing the old version.
Root Cause
Nginx was configured with:
expires 7d
So the browser could cache static files for seven days.
Fix
During development, caching was disabled:
location /static/ {
    add_header Cache-Control "no-store, no-cache, must-revalidate, max-age=0" always;
    add_header Pragma "no-cache" always;
    expires -1;
}
Lesson
Development and production caching strategies are different.
For production, versioned assets are usually better.
❌ Issue 5 — Tailwind CDN Production Warning
Problem
The browser displayed:
cdn.tailwindcss.com should not be used in production
Root Cause
The Tailwind Play CDN was being used.
Fix
I downloaded a local CSS build:
curl -L -o static/css/tailwind.min.css \
https://cdn.jsdelivr.net/npm/tailwindcss@2.2.19/dist/tailwind.min.css
Then referenced the local file.
Lesson
CDNs are convenient for experiments.
For a production-oriented application, bundling required assets locally gives you more control.
❌ Issue 6 — Font Awesome Glyph Warnings
Problem
The browser console displayed warnings such as:
downloadable font: glyf: Glyph bbox was incorrect
There were hundreds of them.
Root Cause
The project was using a beta version of Font Awesome with problematic font metrics.
Fix
The dependency was upgraded to a stable version.
Lesson
Avoid beta dependencies in production unless you have a reason to use them.
❌ Issue 7 — Nginx Serving Stale Content
Problem
This one was confusing.
Running:
curl
showed the new content.
But the browser still displayed the old content.
Root Cause
Again, Nginx/browser caching.
Fix
The same cache-control configuration from Issue 4 solved the problem.
This showed me that:
If two clients appear to see different versions of the same application, always investigate caching.
❌ Issue 8 — app.js Null Error
Problem
The browser showed:
Uncaught TypeError:
can't access property "addEventListener",
document.getElementById(...) is null
The error appeared around line 2.
Root Cause
The JavaScript file had been corrupted by the custom commit script.
Debug
head -5 static/js/app.js
The output immediately showed the wrong content.
Fix
I:
Deleted the corrupted file
Recreated it
Verified the contents
Restarted the container
Tested again
Lesson
Check the actual file before debugging the framework.
❌ Issue 9 — MySQL Health Check Failing
Problem
MySQL was running but Docker reported:
Up (unhealthy)
Root Cause
The original health-check command was more complicated than necessary and did not behave as expected with variable expansion.
Fix
I simplified it:
healthcheck:
  test: ["CMD", "mysqladmin", "ping", "-h", "localhost"]
This was much simpler.
Lesson
A health check should answer one question:
Is the service actually alive?
Don't make the health check unnecessarily complicated.
❌ Issue 10 — Third-Party Chatbot CORS Problem
Problem
The browser reported:
Cross-Origin Request Blocked
and:
CORS header 'Access-Control-Allow-Origin' missing
Root Cause
A third-party chatbot widget did not support the localhost development environment.
Fix
The widget was removed or loaded conditionally.
Example:
<script>
    if (window.location.hostname !== 'localhost') {
        // Load widget
    }
</script>
Lesson
Third-party scripts can introduce problems that have nothing to do with your own application.
When debugging frontend issues, temporarily remove external dependencies.
❌ Issue 11 — Commit Script Corrupted Source Files
This was one of the most serious problems.
Problem
After running the custom commit script:
app.pywas truncatedindex.htmlcontained placeholder commentsapp.jshad incorrect content
Root Cause
The script used commands that modified the actual source files:
cat > file << EOF
and:
sed -i
Fix
I restored the source:
git checkout HEAD~100 -- app.py
Then I changed the strategy.
For commits that did not require file changes:
git commit --allow-empty
Lesson
Never let a Git-history script modify your production source code unnecessarily.
❌ Issue 12 — Git Add Typo
Problem
Git reported:
fatal:
pathspec 'static/css/style.cssmkcommit' did not match
Root Cause
Two lines in the script had accidentally been merged.
Something similar to:
git add static/css/style.cssmkcommit
was generated.
Fix
The script was corrected.
Better Prevention
Before executing a Bash script:
bash -n script.sh
This checks the script syntax without actually executing it.
Lesson
Always syntax-check automation scripts.
❌ Issue 13 — Docker Hub Push Network Timeout
Problem
Docker Hub upload failed with:
use of closed network connection
Root Cause
Several factors combined:
1.97 GB image
+
slow upload
+
unstable network
=
failed push
Fix
Two improvements were made:
First
Reduce the image:
1.97 GB → 847 MB
Second
Use a retry loop:
for i in {1..15}; do
    docker push hritikranjan1/steganovault:latest && break
    sleep 15
done
❌ Issue 14 — IPv6 Docker Hub Problem
Problem
The Docker connection error showed IPv6 addresses.
Root Cause
IPv6 routing to Docker Hub was unstable in my network environment.
Investigation
I tested:
curl -4 -I https://registry-1.docker.io/v2/
and:
curl -6 -I https://registry-1.docker.io/v2/
IPv4 was more reliable.
Fix
I temporarily disabled IPv6:
sudo sysctl -w net.ipv6.conf.all.disable_ipv6=1
sudo sysctl -w net.ipv6.conf.default.disable_ipv6=1
Then:
sudo systemctl restart docker
The lesson here was not:
Always disable IPv6.
The actual lesson was:
Test IPv4 and IPv6 separately when diagnosing network failures.
❌ Issue 15 — OpenCV Download Failure
Problem
During the Docker build:
Downloading opencv_python...
error: incomplete-download
Download failed after 6 attempts
Root Cause
Two OpenCV packages were being installed:
opencv-python
opencv-python-headless
That increased download size.
The network was also slow.
Fix
One workaround was to download Python wheels on the host:
pip download -r requirements.txt -d wheels/
Then copy them into the Docker build:
COPY wheels/ wheels/
and install:
pip install \
--find-links=wheels \
--no-index \
-r requirements.txt
Lesson
For unreliable networks, pre-downloading dependencies can make builds much more predictable.
❌ Issue 16 — Multi-Stage Dockerfile and Missing MySQL Module
Problem
The application reported:
ModuleNotFoundError:
No module named 'mysql'
The entrypoint then kept waiting for MySQL.
Root Cause
The multi-stage Dockerfile created a Python virtual environment in:
/opt/venv/
but the entrypoint script was executing a different Python environment.
So the application could not see the installed MySQL module.
Fix
Instead of continuing to fight the multi-stage setup, I switched back to a simpler single-stage Dockerfile.
Example:
FROM python:3.10-slim

RUN apt-get install -y \
    gcc \
    g++ \
    pkg-config \
    default-libmysqlclient-dev

COPY requirements.txt .

RUN pip install \
    --no-cache-dir \
    -r requirements.txt
Lesson
Multi-stage Dockerfiles can reduce image size, but complexity has a cost.
If a simpler solution is stable and good enough, use it.
❌ Issue 17 — Web Container Became Unhealthy
Problem
Docker reported:
container is unhealthy
The health check also showed:
curl: (7)
Failed to connect to localhost port 5000
Root Cause
The entrypoint script was stuck in an infinite loop waiting for MySQL.
Because the MySQL Python module was missing, the condition never became true.
Gunicorn never started.
Therefore:
Gunicorn not running
       ↓
Port 5000 unavailable
       ↓
Health check fails
       ↓
Container unhealthy
Fix
I added a maximum number of attempts:
MAX_ATTEMPTS=60
ATTEMPT=0

while [ $ATTEMPT -lt $MAX_ATTEMPTS ]; do

    ATTEMPT=$((ATTEMPT + 1))

    if python -c "import mysql.connector; ..."; then
        break
    fi

    sleep 2

done

exec "$@"
Lesson
Every retry or wait loop should have a timeout.
Never create an infinite dependency loop.
The project documentation specifically records this as a health-check failure caused by the entrypoint waiting forever.
❌ Issue 18 — Docker Image Was Too Large
Problem
The final image was:
1.97 GB
Root Cause
Multiple factors:
gcc
g++
pkg-config
default-libmysqlclient-dev
were only needed during build.
There were also:
opencv-python
opencv-python-headless
duplicate/overlapping dependencies.
There were also:
__pycache__
.pyc files
tests
.dist-info
and optional dependencies.
Debugging
I used:
docker history steganovault-web:latest \
--no-trunc \
--human
and:
docker compose exec web \
du -sh /usr/local/lib/python3.10/site-packages/* \
| sort -h \
| tail -10
Fix
Remove unnecessary build dependencies after installation.
Clean Python cache files.
Remove tests.
Use .dockerignore.
Avoid duplicate packages.
Result
1.97 GB
   ↓
847 MB
A reduction of approximately:
57%
🧠 What These 18 Issues Taught Me
The most important thing I learned is that debugging is not about randomly trying commands.
A better process is:
Observe
   ↓
Collect Logs
   ↓
Identify Symptoms
   ↓
Create Hypothesis
   ↓
Test Hypothesis
   ↓
Find Root Cause
   ↓
Apply Fix
   ↓
Verify
   ↓
Document
For example:
Container unhealthy
       ↓
Check docker compose ps
       ↓
Check container logs
       ↓
Check health state
       ↓
Find ModuleNotFoundError
       ↓
Find Python environment mismatch
       ↓
Fix Dockerfile
       ↓
Rebuild
       ↓
Verify health
That is much better than randomly restarting everything.
🧪 Useful Debugging Commands
These commands became extremely useful during the project.
Check running containers
docker ps
Check all containers
docker ps -a
Check Compose status
docker compose ps
View logs
docker compose logs
View logs for one service
docker compose logs web
Follow logs
docker compose logs -f web
Inspect container
docker inspect steganovault-web
Inspect health
docker inspect steganovault-web \
--format='{{json .State.Health}}'
Enter container
docker compose exec web bash
Check file contents
head -5 static/js/app.js
Count file lines
wc -l static/css/style.css
Check Docker image history
docker history steganovault-web:latest
🔐 Security Considerations
SteganoVault is an educational/portfolio project and should not automatically be treated as a hardened production security system.
There are several things to consider.
Never commit .env
Bad:
.env
inside Git.
Good:
.env.example
without real credentials.
Use strong passwords
Do not use:
password123
in a real deployment.
The credentials shown in this tutorial are demonstration values.
Change them before deploying publicly.
Protect MySQL
In a public production deployment, you generally don't want to expose MySQL directly to the internet.
Instead:
Internet
   ↓
Nginx
   ↓
Application
   ↓
Internal MySQL
Use HTTPS
A real public deployment should use:
HTTPS
instead of plain HTTP.
Validate Uploaded Files
File-upload applications need careful validation.
You should validate:
File type
File size
File extension
MIME type
Filename
Processing limits
Temporary File Cleanup
The application uses temporary directories for processing.
These files should be cleaned after processing.
Don't Trust User Input
Always validate:
File names
Messages
Passwords
Form values
Query parameters
⚠️ Important Steganography Security Note
Steganography is not the same thing as strong encryption.
Hiding a message inside an image does not automatically mean that the message is cryptographically secure.
A stronger architecture for sensitive information would be:
Secret Message
      ↓
Strong Encryption
      ↓
Encrypted Message
      ↓
Steganography
      ↓
Carrier File
This combines:
Encryption
+
Steganography
instead of relying only on hiding the message.
📈 Performance Considerations
File processing can consume significant CPU and memory.
For example:
Large Video
     ↓
Decode
     ↓
OpenCV / FFmpeg
     ↓
Processing
     ↓
Encode
     ↓
Output
This can be much more expensive than a normal API request.
That is why the future architecture could move heavy processing into background workers.
🚧 Limitations
The current version has several limitations.
1. Large file processing
Large video/audio files can require substantial resources.
2. Temporary storage
Files are processed using temporary directories.
3. Single application container
Horizontal scaling would require additional work.
4. Local MySQL
The database currently runs inside Docker Compose.
5. No full monitoring stack
There is no complete Prometheus/Grafana monitoring stack yet.
6. No automated HTTPS
HTTPS is part of the future roadmap.
🚀 Future Improvements
The project roadmap includes several improvements.
1. HTTPS with Let's Encrypt
Add:
HTTPS
+
Automatic SSL renewal
2. GitHub Actions CI/CD
A future workflow:
GitHub Push
     ↓
GitHub Actions
     ↓
Run Tests
     ↓
Build Docker Image
     ↓
Push to Docker Hub
     ↓
Deploy
3. Prometheus + Grafana
Add monitoring:
Application
     ↓
Metrics
     ↓
Prometheus
     ↓
Grafana
4. Redis
Redis could be used for:
Sessions
Caching
Distributed state
5. Amazon S3
Instead of temporary/local file storage:
Application
     ↓
Amazon S3
This would make file storage easier to scale.
6. Celery
Large files should not block a web request.
A better architecture could be:
User
 ↓
Flask
 ↓
Queue
 ↓
Celery Worker
 ↓
File Processing
 ↓
Storage
7. Smaller Docker Image
The current optimized image is:
847 MB
A future target could be significantly smaller using more aggressive dependency and base-image optimization.
8. Rate Limiting
Public deployments should consider rate limiting to prevent abuse.
🏗️ Future Architecture
The long-term architecture could look like:
                         🌐 Internet
                              │
                              ▼
                       ┌─────────────┐
                       │   Nginx     │
                       │ HTTPS       │
                       └──────┬──────┘
                              │
                              ▼
                       ┌─────────────┐
                       │   Flask     │
                       │ API         │
                       └──────┬──────┘
                              │
             ┌────────────────┼────────────────┐
             │                │                │
             ▼                ▼                ▼
         MySQL             Redis           Celery
             │                                 │
             │                                 ▼
             │                          File Processing
             │                                 │
             │                                 ▼
             │                                S3
             │
             ▼
        Persistent Data
That would be much closer to a scalable production architecture.
🎓 What I Learned
This project taught me much more than just Docker commands.
Docker
I learned:
Docker images
Containers
Dockerfiles
Volumes
Networks
Health checks
Container dependencies
Image optimization
Docker Compose
Docker Hub
Networking
I learned:
Container DNS
Service names
Internal ports
Host ports
Reverse proxying
IPv4 vs IPv6
CORS
HTTP routing
Nginx
I learned:
Reverse proxy
Static file serving
Gzip
Upload limits
Cache headers
Proxy headers
MySQL
I learned:
Containerized MySQL
Initialization scripts
Health checks
Persistent volumes
Database connectivity
Connection handling
Python
I learned more about:
Flask
Gunicorn
File uploads
Temporary directories
Image processing
Audio/video processing
Authentication
Git
I learned:
.gitignoreCommit history
GitHub remotes
SSH authentication
Meaningful commits
Automation risks
Debugging
Most importantly, I learned:
Read the error before trying to fix it.
An error message is usually telling you something.
For example:
address already in use
means:
Something is already using the port.
ModuleNotFoundError
means:
Python cannot find the required module.
connection refused
means:
The destination is not accepting connections.
container unhealthy
means:
The health check is failing, not necessarily that Docker itself is broken.
🧠 The Biggest Lesson
The biggest lesson from this project was:
Simple beats clever.
I spent significant time trying to make a more complicated multi-stage Dockerfile work.
Eventually, a simpler single-stage Dockerfile was easier to maintain and debug.
The same principle appeared everywhere.
A simple health check:
mysqladmin ping
was better than a complicated health-check expression.
A local Tailwind CSS file was easier than relying on a development CDN.
A straightforward app.py was easier to debug than prematurely splitting the project into many modules.
The goal is not to make the architecture look complicated.
The goal is:
Make the system reliable, understandable, and maintainable.
💡 What I Would Do Differently
If I started this project again, I would:
1. Pin base images
Instead of relying on moving tags:
python:3.10-slim
I would use a more controlled base-image strategy.
2. Create .gitignore immediately
Before the first commit.
3. Avoid risky automation
I would not use a script that modifies source files just to generate commits.
4. Optimize dependencies earlier
I would inspect:
docker history
much earlier.
5. Test the network before Docker Hub deployment
Especially:
curl -4
curl -6
6. Keep development and production configuration separate
For example:
Development
    ↓
No aggressive caching
while:
Production
    ↓
Versioned assets
+
Caching
+
HTTPS
🏆 Final Result
What started as:
Flask
+
MySQL
became:
                    SteganoVault
                         │
          ┌──────────────┼──────────────┐
          │              │              │
       Frontend       Backend        Database
          │              │              │
        HTML/CSS       Flask          MySQL
        JavaScript     Gunicorn
          │              │
          └───────┬──────┘
                  │
                Nginx
                  │
              Docker Compose
                  │
       ┌──────────┼───────────┐
       │          │           │
     Network    Volume     Health
                  │          Checks
                  │
              MySQL Data
And then:
GitHub
   ↓
Docker Build
   ↓
Docker Image
   ↓
Optimization
   ↓
Docker Hub
   ↓
Deployable Application
The final Docker image was reduced from:
1.97 GB
to:
847 MB
And the application became a complete learning project covering:
Python
Flask
MySQL
Authentication
File Processing
Steganography
Docker
Docker Compose
Nginx
Networking
Health Checks
Volumes
Git
GitHub
Docker Hub
Debugging
Image Optimization
❤️ Final Thoughts
The most valuable part of this project wasn't the final UI.
It wasn't the number of features.
It wasn't even the Docker image.
It was the debugging journey.
Every problem forced me to understand something deeper.
A port conflict taught me about host-port mapping.
A health-check failure taught me about service readiness.
A broken JavaScript file taught me to verify files before debugging the browser.
A Docker Hub timeout taught me that image size and network reliability matter.
The IPv6 problem taught me to isolate network variables.
The multi-stage Docker problem taught me that complexity has a cost.
The 1.97 GB image taught me that Docker image optimization is not optional when deploying over a slow network.
And the Git script problem taught me perhaps the most important lesson:
Automation is powerful, but automation that you don't understand can damage the system faster than manual work.
That's what made SteganoVault more than just another project.
It became a complete DevOps learning experience.
🔗 Project Links
GitHub Repository
https://github.com/hritikranjan1/SteganoVault-Docker
Docker Hub
https://hub.docker.com/r/hritikranjan1/steganovault
Live Demo
Coming soon.
📚 Recommended Documentation
For learning more about the technologies used in this project:
Docker documentation
Docker Compose documentation
Flask documentation
Nginx documentation
MySQL documentation
Git documentation
Docker Hub documentation
🙌 If This Project Helped You
If you're also learning Docker, DevOps, Flask, or containerization, feel free to:
⭐ Star the repository
🐛 Report bugs
💡 Suggest improvements
🔀 Submit pull requests
📚 Use the project for learning
And remember:
Don't just build projects that work. Build projects that teach you something.
🏷️ Tags
#docker #dockercompose #devops #flask #python #mysql #nginx #steganography #cybersecurity #webdevelopment
📸 Visuals You Can Add to This Article
For a strong Hashnode article, I recommend adding your own SteganoVault screenshots at these points:
Visual 1 — Cover
Use the application's Cyberpunk theme showing the main UI.
Visual 2 — Architecture
Use the architecture diagram from this article.
Visual 3 — Docker Containers
Screenshot:
docker compose ps
showing all four containers healthy.
Visual 4 — Application
Screenshot of:
http://localhost
Visual 5 — Encoding
Screenshot showing:
Carrier file
+
Secret message
+
Password
Visual 6 — Decoding
Screenshot showing:
Decoded message
Visual 7 — phpMyAdmin
Screenshot of the database tables.
Visual 8 — Docker Image Optimization
Show:
Before: 1.97 GB
After: 847 MB
This makes the optimization story visually stronger.
Visual 9 — Docker Hub
Show the published image repository.
Visual 10 — Debugging
Show one or two real terminal errors followed by the fixed output.
These visuals will make the article much more engaging than using generic stock images everywhere.
🎯 Hashnode SEO Settings
Recommended Title
Building SteganoVault: A Production-Grade Steganography Tool with Docker, Flask, MySQL & Nginx
Recommended Subtitle
18 real bugs, 4 Docker containers, Docker Hub deployment, image optimization, and everything I learned building SteganoVault
Suggested Slug
building-steganovault-steganography-docker-flask-mysql-nginx
Meta Description
Learn how I built SteganoVault, a full-stack steganography platform using Flask, MySQL, Nginx and Docker Compose, including architecture, deployment, 18 real bugs, Docker Hub, and image optimization.
Recommended Tags
docker
docker-compose
devops
flask
python
Additional tags you can use if Hashnode allows more:
mysql
nginx
steganography
cybersecurity
web-development
🚀 Final Takeaway
If you're learning DevOps, don't only practice:
docker run nginx
Build something that actually has problems.
Build something with:
Multiple Containers
        +
Database
        +
Persistent Storage
        +
Reverse Proxy
        +
Health Checks
        +
Networking
        +
Authentication
        +
File Processing
        +
Docker Hub
        +
GitHub
Because that's where the real learning starts.
SteganoVault started as a steganography application.
It ended up becoming my practical lesson in:
Docker + DevOps + Backend + Networking + Debugging + Deployment.

🚀 Complete Learning & Career Resources | 2027–2028
A curated collection of learning resources for AI, Data Analytics, Python, Data Engineering, Cybersecurity, Cloud, Networking, Finance, Digital Marketing, Project Management, DevOps and Generative AI.
📚 Learn → 🧪 Practice → 🛠️ Build → 🐙 Share → 🚀 Grow









🌟 About This Repository
Welcome to the Complete Learning & Career Resources Repository! 🚀
This repository is designed as a centralized learning hub for students, developers, QA engineers, DevOps engineers, cloud learners, cybersecurity enthusiasts, data professionals, project managers, business professionals and anyone interested in continuous learning.
The goal is simple:
Learn → Practice → Build → Document → Share → Grow
Instead of searching for useful resources again and again, this repository brings them together in one place.
🎯 What You Will Find Here
🤖 Artificial Intelligence
🧠 Generative AI
📊 Data Analytics
🐍 Python
⚙️ Data Engineering
☁️ Cloud Computing
🌐 Computer Networking
🔐 Cybersecurity
⚙️ DevOps
📋 Project Management
💰 Finance
📈 Digital Marketing
🧩 Business Analysis
🚀 Career Development
🎓 Professional Learning
🛠️ Project Ideas
📚 Learning Roadmaps
📊 Repository Overview
| Category | Resources |
|---|---|
| 🤖 AI Courses | 15 |
| 🔵 Google Courses | 15 |
| 🟣 IBM Courses | 10 |
| 🔥 Best Courses 2027–2028 | 21 |
| 🌟 Learning & Career Resources | 14 |
| 📖 Personal Resources | 4+ |
📚 Table of Contents
🤖 AI Courses
🚀 Explore AI fundamentals, Python, AI infrastructure, Generative AI, AI governance and specialized AI applications.
| # | Course | Link |
|---|---|---|
| 1 | AI For Everyone | Start Course ↗ |
| 2 | AI Python for Beginners | Start Course ↗ |
| 3 | AI Infrastructure and Operations Fundamentals | Start Course ↗ |
| 4 | Generative AI for Human Resources (HR) Professionals | Start Course ↗ |
| 5 | AI Fundamentals | Start Course ↗ |
| 6 | AI for Healthcare | Start Course ↗ |
| 7 | AI Applications in Accounting and Finance | Start Course ↗ |
| 8 | AI Governance and Privacy Professional Certification (AIGP) | Start Course ↗ |
| 9 | Ethics and Governance in the Age of Generative AI | Start Course ↗ |
| 10 | Hands-on quantum error correction with Google Quantum AI | Start Course ↗ |
| 11 | AI-Powered Higher Education | Start Course ↗ |
| 12 | Modern Project Leadership: Agile, AI, and Beyond | Start Course ↗ |
| 13 | AI-Powered Business Analysis: Excel, KPIs & GenAI | Start Course ↗ |
| 14 | AI in Law: Research, Risk, and Legal Drafting | Start Course ↗ |
| 15 | Generative AI for Project Managers | Start Course ↗ |
🔵 Google Courses
🌐 Explore Data Analytics, AI, Cybersecurity, Networking, Cloud, Digital Marketing and Project Management.
| # | Course | Link |
|---|---|---|
| 1 | Foundations: Data, Data, Everywhere | Start Course ↗ |
| 2 | Ask Questions to Make Data-Driven Decisions | Start Course ↗ |
| 3 | Prepare Data for Exploration | Start Course ↗ |
| 4 | Agile Project Management | Start Course ↗ |
| 5 | Project Initiation: Starting a Successful Project | Start Course ↗ |
| 6 | AI Fundamentals | Start Course ↗ |
| 7 | Foundations of Digital Marketing and E-commerce | Start Course ↗ |
| 8 | Play It Safe: Manage Security Risks | Start Course ↗ |
| 9 | The Bits and Bytes of Computer Networking | Start Course ↗ |
| 10 | Analyze Data to Answer Questions | Start Course ↗ |
| 11 | Automate Cybersecurity Tasks with Python | Start Course ↗ |
| 12 | Architecting with Google Compute Engine | Start Course ↗ |
| 13 | AI for Writing and Communicating | Start Course ↗ |
| 14 | From Likes to Leads: Interact with Customers Online | Start Course ↗ |
| 15 | AI for Data Analysis | Start Course ↗ |
🟣 IBM Courses
💙 Explore SQL, Python, Data Analytics, Deep Learning, RAG and Generative AI resources.
| # | Course | Link |
|---|---|---|
| 1 | Databases and SQL for Data Science with Python | Start Course ↗ |
| 2 | RAG and Agentic AI Capstone Project | Start Course ↗ |
| 3 | Excel Basics for Data Analysis | Start Course ↗ |
| 4 | Introduction to Data Analytics | Start Course ↗ |
| 5 | Data Visualization and Dashboards with Excel and Cognos | Start Course ↗ |
| 6 | IBM AI Foundations for Business | Start Course ↗ |
| 7 | AI Capstone Project with Deep Learning | Start Course ↗ |
| 8 | Python Project for Data Engineering | Start Course ↗ |
| 9 | Building Generative AI-Powered Applications with Python | Start Course ↗ |
| 10 | Vector Databases for RAG: An Introduction | Start Course ↗ |
🔥 Best Courses 2027–2028
🎯 A broader collection covering AI, Data, Python, Finance, Cybersecurity, Marketing, Networking, Management and Data Engineering.
| # | Course | Link |
|---|---|---|
| 1 | AI For Everyone | Start Course ↗ |
| 2 | Foundations: Data, Data, Everywhere | Start Course ↗ |
| 3 | Ask Questions to Make Data-Driven Decisions | Start Course ↗ |
| 4 | Prepare Data for Exploration | Start Course ↗ |
| 5 | Financial Markets | Start Course ↗ |
| 6 | Agile Project Management | Start Course ↗ |
| 7 | Play It Safe: Manage Security Risks | Start Course ↗ |
| 8 | Project Initiation: Starting a Successful Project | Start Course ↗ |
| 9 | AI Fundamentals | Start Course ↗ |
| 10 | Analyze Data to Answer Questions | Start Course ↗ |
| 11 | Foundations of Digital Marketing and E-commerce | Start Course ↗ |
| 12 | The Bits and Bytes of Computer Networking | Start Course ↗ |
| 13 | Sequence Models | Start Course ↗ |
| 14 | Federal Taxation I: Individuals, Employees, and Sole Proprietors | Start Course ↗ |
| 15 | Designing the Organization | Start Course ↗ |
| 16 | Game Theory | Start Course ↗ |
| 17 | Using Python to Access Web Data | Start Course ↗ |
| 18 | Viral Marketing and How to Craft Contagious Content | Start Course ↗ |
| 19 | Python Project for Data Engineering | Start Course ↗ |
| 20 | Value Chain Management | Start Course ↗ |
| 21 | Applying Data Analytics in Finance | Start Course ↗ |
🌟 Learning & Career Resources
💡 Additional resources for learning, career development, language learning, hosting, education and professional growth.
🗺️ Recommended Learning Roadmaps
Choose one roadmap according to your career goal. You don't need to learn everything at once.
🤖 AI Roadmap
AI Fundamentals
      ↓
Python Basics
      ↓
Mathematics & Statistics
      ↓
Data Fundamentals
      ↓
Machine Learning
      ↓
Deep Learning
      ↓
Generative AI
      ↓
Prompt Engineering
      ↓
RAG
      ↓
Vector Databases
      ↓
Agentic AI
      ↓
AI Applications
      ↓
Real-World Projects
      ↓
GitHub Portfolio