
Kubernetes Local Installation Guide for Beginners: KIND & Minikube Step-by-Step
If you are learning Kubernetes, DevOps, Docker, or Cloud, one of the first things you need is a Kubernetes cluster where you can practice without spending money on AWS or other cloud platforms.
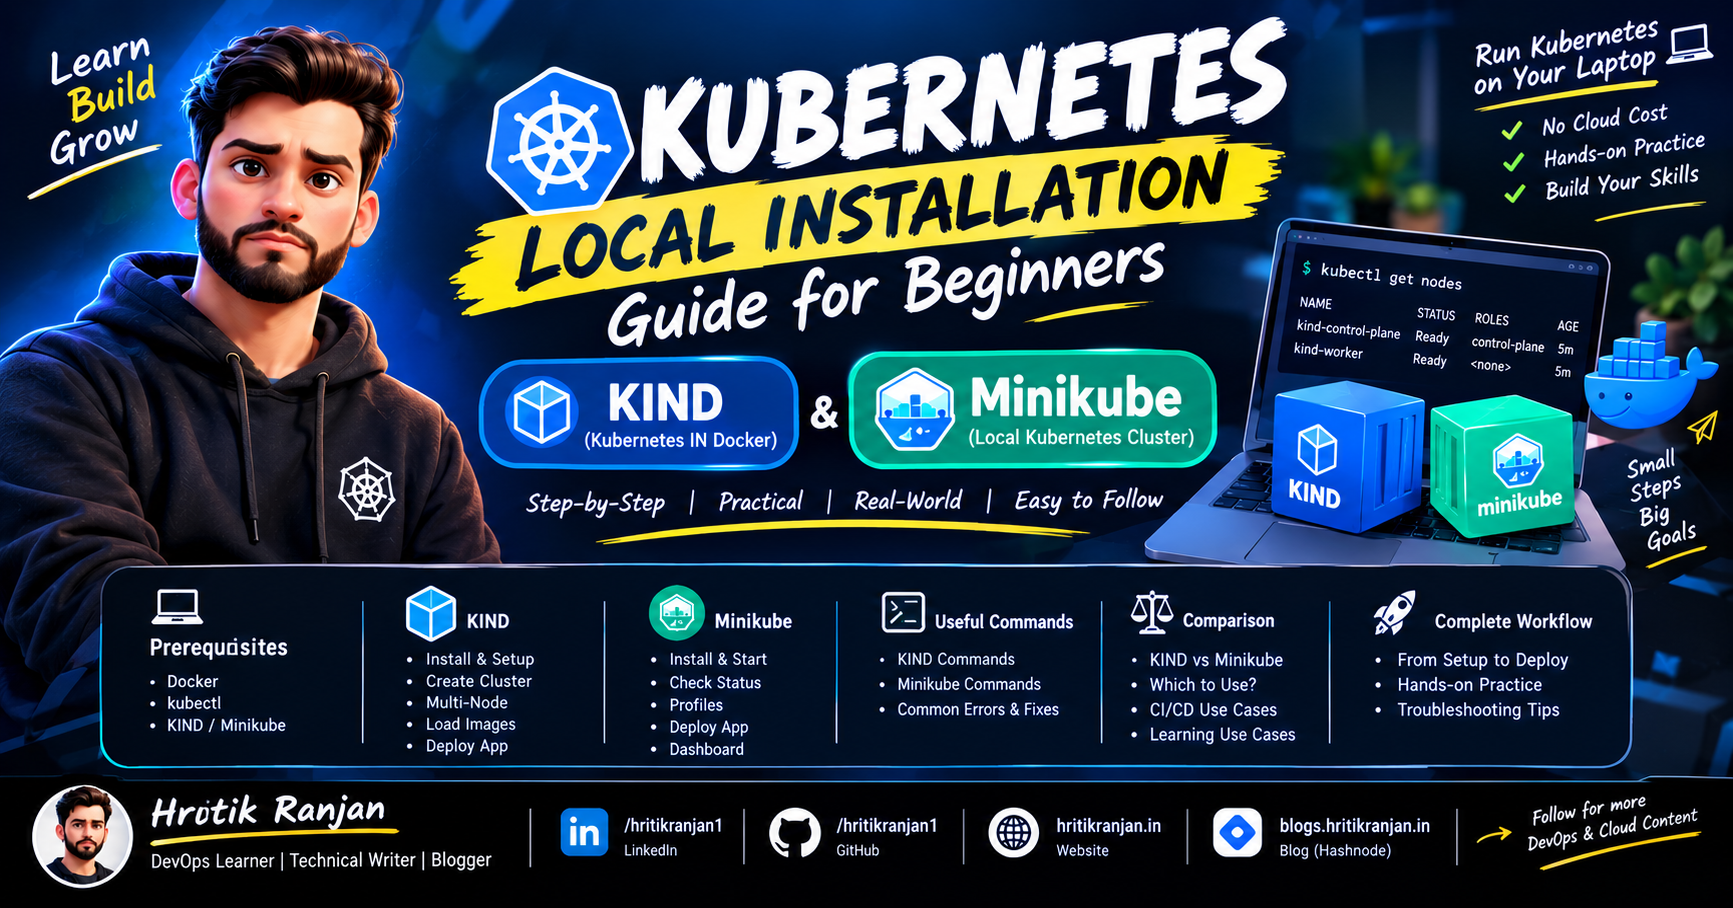
The good news is that you can run a complete Kubernetes cluster directly on your laptop.
In this guide, we will learn two of the most popular ways to run Kubernetes locally:
KIND — Kubernetes IN Docker
Minikube — Local Kubernetes Cluster
This guide is written from a beginner's perspective. We will start from the basics and gradually create, verify, use, troubleshoot, and delete Kubernetes clusters.
📌 What You Will Learn
By the end of this blog, you will understand:
What a local Kubernetes cluster is
Why we need KIND and Minikube
KIND vs Minikube
Kubernetes components required locally
What
kubectldoesWhat a Kubernetes node is
How KIND works internally
How Minikube works internally
Prerequisites for installation
Installing Docker
Installing
kubectlInstalling KIND
Creating your first KIND cluster
Checking KIND cluster status
Understanding Kubernetes contexts
Creating a multi-node KIND cluster
Loading Docker images into KIND
Deploying an application on KIND
Installing Minikube
Starting a Minikube cluster
Checking Minikube status
Understanding Minikube profiles
Deploying an application on Minikube
Accessing applications
Minikube Dashboard
Useful Minikube commands
Useful KIND commands
Common errors and solutions
KIND vs Minikube comparison
Which one beginners should use
When to use KIND in CI/CD
When to use Minikube for learning
Complete practice workflow
1. What Is Kubernetes?
Before installing KIND or Minikube, let's understand what we are actually installing.
Kubernetes, commonly called K8s, is a container orchestration platform.
Suppose you have a Docker application:
Docker Container
      |
      v
   Application
Running one container manually is easy.
But imagine your application becomes popular.
Now you have:
Application
   |
   +---- Container 1
   +---- Container 2
   +---- Container 3
   +---- Container 4
   +---- Container 5
Now several questions appear:
What happens if a container crashes?
How do we create another container automatically?
How do we distribute traffic?
How do we deploy a new application version?
How do we scale from 5 containers to 20?
How do we manage multiple machines?
How do we perform rolling updates?
This is where Kubernetes becomes useful.
Kubernetes manages containerized applications and provides capabilities such as:
Scheduling
Scaling
Self-healing
Service discovery
Load balancing
Rolling updates
Rollbacks
Configuration management
Secret management
2. What Is a Kubernetes Cluster?
A Kubernetes cluster is a group of machines that work together to run containerized applications.
A simplified cluster looks like this:
                  Kubernetes Cluster
                         |
              +----------+----------+
              |                     |
         Control Plane          Worker Node
              |                     |
      +-------+-------+       +-----+------+
      |       |       |       |            |
   API     Scheduler etcd   kubelet      Pods
 Server
The Control Plane makes decisions.
Worker Nodes run application workloads.
3. What Is a Local Kubernetes Cluster?
In production, Kubernetes might run across many physical or cloud machines.
For example:
                AWS
                 |
       +---------+---------+
       |                   |
 Control Plane          Workers
       |                   |
       |             +-----+-----+
       |             |     |     |
      API            Pod   Pod   Pod
But beginners don't necessarily have several servers available.
Instead, we can create Kubernetes locally.
For example:
Your Laptop
     |
     +------------------+
     | Kubernetes       |
     | Cluster          |
     |                  |
     | Control Plane    |
     | Worker Node      |
     | Pods             |
     +------------------+
This is called a local Kubernetes cluster.
Two popular tools for this are:
KIND
Minikube
4. KIND vs Minikube
Before installing anything, let's understand the difference.
| Feature | KIND | Minikube |
|---|---|---|
| Full name | Kubernetes IN Docker | Minikube |
| Main purpose | Local Kubernetes testing | Kubernetes learning/development |
| Runs using | Container nodes | Container/VM driver |
| Multi-node | Yes | Yes, depending on configuration |
| Beginner friendly | Yes | Yes |
| Dashboard | Not built-in like Minikube | Yes |
| CI testing | Excellent | Good |
| Local development | Excellent | Excellent |
| Docker image workflow | Very convenient | Very convenient |
| Multiple profiles | Via cluster names | Yes |
| Lightweight | Yes | Yes |
Official KIND documentation describes KIND as a tool for running local Kubernetes clusters using container nodes. (Kind)
Minikube describes itself as local Kubernetes focused on making Kubernetes easy to learn and develop with. (minikube)
5. What Is KIND?
KIND stands for:
Kubernetes IN Docker
The basic idea is very simple.
Instead of creating actual virtual machines for Kubernetes nodes, KIND uses containers as Kubernetes nodes.
For example:
Your Ubuntu Laptop
       |
      Docker
       |
       +-----------------------+
       | Kubernetes Cluster    |
       |                       |
       | +-------------------+ |
       | | Control Plane     | |
       | | Docker Container  | |
       | +-------------------+ |
       |                       |
       | +-------------------+ |
       | | Worker Node       | |
       | | Docker Container  | |
       | +-------------------+ |
       +-----------------------+
This makes KIND very useful for local testing.


6. How KIND Works
Suppose you execute:
kind create cluster
KIND creates a Kubernetes node using a container.
You can verify this using:
docker ps
You may see something similar to:
CONTAINER ID   IMAGE                  NAMES
abc123         kindest/node:...       kind-control-plane
Here:
kind-control-plane
is a Docker container.
But internally, that container behaves as a Kubernetes node.
This is one of the most important concepts to understand.
Traditional environment
Physical/VM Server
       |
       Kubernetes Node
KIND environment
Laptop
  |
Docker
  |
Container
  |
Kubernetes Node
7. What Is Minikube?
Minikube is another popular tool for running Kubernetes locally.
Its goal is to make it easy for developers and learners to run Kubernetes on their own machine.
Minikube can use different drivers such as:
Docker
KVM
VirtualBox
Hyper-V
VMware
other supported drivers
The exact available drivers depend on your operating system.
The official Minikube documentation currently recommends at least 2 CPUs, 2 GB free memory, 20 GB free disk space, an internet connection, and a supported container or VM manager for the basic setup. (minikube)


8. KIND Architecture vs Minikube Architecture
KIND
             Laptop
                |
              Docker
                |
       +--------+--------+
       |                 |
 Control Plane        Worker
 Container            Container
       |                 |
 Kubernetes           Kubernetes
 components           components
Minikube
With the Docker driver:
              Laptop
                 |
               Docker
                 |
             Minikube
                 |
        Kubernetes Cluster
                 |
              Node
                 |
                Pods
The important difference is the implementation.
KIND primarily treats containers as Kubernetes nodes.
Minikube manages a local Kubernetes environment using a supported driver.
9. What Is kubectl?
You will use another important tool:
kubectl
Pronounced:
kube-control
kubectl is the command-line client used to communicate with the Kubernetes API server.
Think about it like this:
You
 |
 | kubectl commands
 v
Kubernetes API Server
 |
 v
Kubernetes Cluster
For example:
kubectl get nodes
means:
Kubernetes, show me the nodes in my cluster.
Another example:
kubectl get pods
means:
Kubernetes, show me the Pods.
10. Prerequisites
For this tutorial, I will primarily use:
Ubuntu Linux
Docker
kubectl
KIND
Minikube
You can follow the concepts on Windows and macOS too, but Linux commands are used throughout this guide.
11. Step 1 — Check Your Operating System
Run:
uname -a
For CPU architecture:
uname -m
Typical output:
x86_64
This means you have a 64-bit x86 architecture.
You can also check Ubuntu:
cat /etc/os-release
Example:
NAME="Ubuntu"
VERSION="..."
12. Step 2 — Check Docker
KIND needs a container runtime.
Docker is one of the most common choices.
Check Docker:
docker --version
Example:
Docker version 29.x.x
Now check whether Docker is running:
docker ps
If Docker is working, you should get the container list.
It may be empty:
CONTAINER ID IMAGE COMMAND CREATED STATUS PORTS NAMES
That's completely fine.
13. If Docker Gives Permission Denied
You might see:
permission denied while trying to connect to the Docker daemon socket
This generally means your user does not have permission to communicate with Docker.
Add your user to the Docker group:
sudo usermod -aG docker $USER
Then either log out and log back in, or run:
newgrp docker
Now test:
docker ps
If it works without sudo, you are ready.
14. Step 3 — Install kubectl
First check whether it is already installed:
kubectl version --client
If it works, you can continue.
If not, install it using the official Kubernetes installation instructions appropriate for your Ubuntu release.
After installation, verify:
kubectl version --client
You should get client version information.
15. Understanding kubeconfig
There is one more important concept.
kubectl needs to know:
Which Kubernetes cluster should I communicate with?
This information is stored in a configuration file called:
kubeconfig
Usually:
~/.kube/config
You can check your current context:
kubectl config current-context
List all contexts:
kubectl config get-contexts
Example:
CURRENT   NAME
*         kind-kind
          minikube
The * tells you which context is currently selected.
PART 1 — KIND INSTALLATION
16. Install KIND on Ubuntu
The official KIND documentation provides prebuilt binaries for Linux.
For x86_64:
curl -Lo ./kind https://kind.sigs.k8s.io/dl/v0.33.0/kind-linux-amd64
Make it executable:
chmod +x ./kind
Move it into a directory in your PATH:
sudo mv ./kind /usr/local/bin/kind
Verify:
kind version
The KIND documentation currently lists v0.33.0 as the stable tagged release and provides the corresponding Linux binaries. Always check the official documentation if you are following this guide later because releases can change. (Kind)
17. Check KIND Help
Run:
kind --help
You will see commands such as:
create
delete
get
load
export
You can also check:
kind create cluster --help
This is a very useful habit.
Instead of trying to memorize every option:
command --help
18. Create Your First KIND Cluster
Now comes the exciting part.
Run:
kind create cluster
KIND will:
Download the required node image if necessary.
Create the Kubernetes control-plane node.
Configure Kubernetes.
Configure networking.
Configure kubeconfig.
Make the cluster accessible through
kubectl.
You should eventually see a successful completion message.
19. Check KIND Cluster
Run:
kind get clusters
Expected:
kind
This means your cluster is named:
kind
20. Check Kubernetes Nodes
Run:
kubectl get nodes
Example:
NAME                 STATUS   ROLES           AGE   VERSION
kind-control-plane   Ready    control-plane   ...   ...
The important word is:
Ready
This means the Kubernetes node is ready to accept workloads.
21. Check Cluster Information
Run:
kubectl cluster-info
You may see information about:
Kubernetes control plane
CoreDNS
cluster endpoints
You can also run:
kubectl get pods -A
Here:
-A
means:
All namespaces.
22. Understand What Happened
When you executed:
kind create cluster
the flow was approximately:
                 Your Laptop
                     |
                   Docker
                     |
             kind-control-plane
                     |
       +-------------+-------------+
       |             |             |
   API Server      etcd       Controller
       |
   Scheduler
       |
    kubelet
       |
      Pods
This is a real Kubernetes cluster, even though it is running locally.
23. Check Docker Containers
Run:
docker ps
You should find a container similar to:
kind-control-plane
This demonstrates KIND's basic architecture.
Docker Container
       |
       +--- Kubernetes Node
24. Create a Named KIND Cluster
You don't have to use the default name.
For example:
kind create cluster --name dev-cluster
Now:
kind get clusters
You may see:
dev-cluster
kind
This is useful when you want multiple Kubernetes clusters on the same laptop.
25. KIND Cluster Context
Check contexts:
kubectl config get-contexts
You may see:
kind-kind
kind-dev-cluster
To switch to a specific cluster:
kubectl config use-context kind-dev-cluster
Then verify:
kubectl config current-context
26. Create a Multi-Node KIND Cluster
This is one of the best features of KIND.
You can create:
1 Control Plane
+
2 Worker Nodes
Create a file:
nano kind-config.yaml
Add:
kind: Cluster
apiVersion: kind.x-k8s.io/v1alpha4

nodes:
  - role: control-plane
  - role: worker
  - role: worker
Save it.
Then create:
kind create cluster --name multi-node --config kind-config.yaml
27. Verify Multi-Node Cluster
Run:
kubectl get nodes
You should see something similar to:
NAME                    STATUS   ROLES
multi-node-control-plane Ready    control-plane
multi-node-worker        Ready    <none>
multi-node-worker2       Ready    <none>
Now you have:
                 KIND Cluster
                     |
            +--------+--------+
            |                 |
       Control Plane       Workers
                            /     \
                         Worker   Worker


28. Why Multi-Node KIND Is Useful
This allows you to practice:
Scheduling
Node labels
Taints
Tolerations
DaemonSets
Deployments
Services
Node failures
Pod distribution
Kubernetes networking
For beginners, this is extremely useful because you can simulate a small cluster without buying multiple cloud servers.
29. Deploy Your First Application on KIND
Let's deploy NGINX.
Create:
nano nginx.yaml
Add:
apiVersion: apps/v1
kind: Deployment

metadata:
  name: nginx-deployment

spec:
  replicas: 2

  selector:
    matchLabels:
      app: nginx

  template:
    metadata:
      labels:
        app: nginx

    spec:
      containers:
        - name: nginx
          image: nginx:latest

          ports:
            - containerPort: 80
Save the file.
Apply it:
kubectl apply -f nginx.yaml
30. Check the Deployment
Run:
kubectl get deployments
You should see:
NAME              READY   UP-TO-DATE   AVAILABLE
nginx-deployment  2/2     2            2
31. Check Pods
kubectl get pods
Example:
nginx-deployment-xxxxx   1/1   Running
nginx-deployment-yyyyy   1/1   Running
We requested:
replicas: 2
Therefore Kubernetes created two Pods.
32. Understand the Relationship
This is important.
Deployment
     |
     v
ReplicaSet
     |
     +--------+
     |        |
    Pod      Pod
     |        |
  NGINX     NGINX
The Deployment manages the desired state.
The ReplicaSet maintains the number of Pods.
The Pods run the containers.
33. Expose the Application
Create a Service:
kubectl expose deployment nginx-deployment \
  --type=NodePort \
  --port=80
Check:
kubectl get services
You will see a Service.
For KIND, accessing NodePort directly from your host can depend on the cluster configuration. For beginner testing, port mappings or kubectl port-forward are often simpler.
34. Use Port Forwarding
Run:
kubectl port-forward deployment/nginx-deployment 8080:80
You should get something similar to:
Forwarding from 127.0.0.1:8080 -> 80
Now open:
http://localhost:8080
You should see the NGINX welcome page.
Congratulations! 🎉
You just deployed an application to your local Kubernetes cluster.
35. Load Your Own Docker Image into KIND
This is extremely useful for DevOps projects.
Suppose you build:
docker build -t myapp:v1 .
Normally, your local Docker image is not automatically available inside KIND's Kubernetes nodes.
You can load it:
kind load docker-image myapp:v1
For a named cluster:
kind load docker-image myapp:v1 --name multi-node
The official KIND documentation supports loading local Docker images directly into a KIND cluster. (Kind)
Then Kubernetes can use:
image: myapp:v1
For local images, avoid relying on :latest when possible. Using a specific tag makes image behavior more predictable.
36. Delete KIND Cluster
When you're finished:
kind delete cluster
For a named cluster:
kind delete cluster --name multi-node
Check:
kind get clusters
The deleted cluster should no longer appear.
PART 2 — MINIKUBE
37. What Is Minikube?
Minikube is another excellent tool for learning Kubernetes locally.
It provides a local Kubernetes cluster and can use different drivers to run it.
For beginners, Docker is usually a convenient choice when Docker is already installed.
Official Minikube documentation currently supports Docker and several VM/container managers as drivers. (minikube)
38. Minikube Architecture
A simplified Docker-driver setup looks like:
             Your Laptop
                  |
                Docker
                  |
              Minikube
                  |
          Kubernetes Node
                  |
        +---------+---------+
        |         |         |
       Pod       Pod       Pod


39. Install Minikube on Ubuntu
The official Minikube documentation provides an x86-64 Linux binary installation method:
curl -LO https://github.com/kubernetes/minikube/releases/latest/download/minikube-linux-amd64
Install it:
sudo install minikube-linux-amd64 /usr/local/bin/minikube
Remove the downloaded file:
rm minikube-linux-amd64
Verify:
minikube version
The official documentation also provides Debian package installation and ARM64 instructions. (minikube)
40. Check Minikube Help
Run:
minikube --help
For a specific command:
minikube start --help
This is useful when you want to understand available drivers and options.
41. Start Your First Minikube Cluster
The easiest command is:
minikube start
Minikube will detect an appropriate driver when possible and create a local Kubernetes cluster.
If Docker is your preferred driver, you can explicitly specify it:
minikube start --driver=docker
This tells Minikube:
Use Docker as the underlying driver.
42. What Happens During minikube start?
A simplified flow:
minikube start
      |
      v
Check driver
      |
      v
Create local environment
      |
      v
Configure Kubernetes
      |
      v
Start control-plane components
      |
      v
Configure kubectl
      |
      v
Cluster Ready
43. Check Minikube Status
Run:
minikube status
You should see components such as:
host: Running
kubelet: Running
apiserver: Running
kubeconfig: Configured
The exact output can vary between Minikube versions and drivers.
44. Check Kubernetes Nodes
Run:
kubectl get nodes
You should see something like:
NAME       STATUS   ROLES           AGE
minikube   Ready    control-plane   ...
Again, the most important status is:
Ready
45. Check All Pods
Run:
kubectl get pods -A
This displays Pods from all namespaces.
You may see namespaces such as:
kube-system
default
and system components.
46. Check Minikube Cluster Information
Run:
kubectl cluster-info
You can also use:
minikube status
These commands help you quickly determine whether your cluster is healthy.
47. Minikube Dashboard
One of Minikube's beginner-friendly features is its Dashboard.
Run:
minikube dashboard
Minikube will launch the Kubernetes Dashboard if available/configured for your environment.
The Dashboard gives you a graphical way to inspect:
Pods
Deployments
Services
Namespaces
ConfigMaps
Secrets
workloads
cluster resources
For beginners, this can make Kubernetes easier to visualize.
48. Deploy NGINX on Minikube
Let's use the same Deployment.
Create:
nano nginx.yaml
Add:
apiVersion: apps/v1
kind: Deployment

metadata:
  name: nginx-deployment

spec:
  replicas: 2

  selector:
    matchLabels:
      app: nginx

  template:
    metadata:
      labels:
        app: nginx

    spec:
      containers:
        - name: nginx
          image: nginx:latest

          ports:
            - containerPort: 80
Apply:
kubectl apply -f nginx.yaml
49. Verify NGINX
Deployment:
kubectl get deployment
Pods:
kubectl get pods
Detailed Pod information:
kubectl describe pod <pod-name>
Logs:
kubectl logs <pod-name>
50. Create a Service
Expose the deployment:
kubectl expose deployment nginx-deployment \
  --type=NodePort \
  --port=80
Check:
kubectl get service
51. Access NGINX Using Minikube
Minikube provides a convenient command:
minikube service nginx-deployment
Depending on your environment, this can open or display the URL for the Service.
You can also retrieve the URL:
minikube service nginx-deployment --url
Then open the returned URL in your browser.
52. Port Forwarding Also Works
Another beginner-friendly option is:
kubectl port-forward deployment/nginx-deployment 8080:80
Then open:
http://localhost:8080
53. Minikube Profiles
Minikube supports multiple profiles.
A profile is essentially a separate Minikube cluster configuration.
List profiles:
minikube profile list
Example:
Profile     Status
minikube    Running
Create another profile:
minikube start -p dev-cluster
Now:
minikube profile list
You can have separate environments for practice.
For example:
minikube
dev-cluster
test-cluster
54. Switch Minikube Profile
Use:
minikube profile dev-cluster
Then check:
minikube status
Remember that Minikube profiles and Kubernetes contexts are related but are not exactly the same concept.
Always verify the active Kubernetes context:
kubectl config current-context
55. Stop Minikube
If you don't need the cluster temporarily:
minikube stop
This is different from deleting it.
The cluster configuration remains available.
56. Start Minikube Again
Later:
minikube start
Your existing profile can be started again.
57. Delete Minikube
If you want to completely remove the cluster:
minikube delete
This removes the Minikube cluster.
To remove a specific profile:
minikube delete -p dev-cluster
58. Minikube Addons
Minikube provides addons.
List them:
minikube addons list
You may see addons related to:
dashboard
ingress
metrics
storage
registry
monitoring
Enable an addon using:
minikube addons enable <addon-name>
For example:
minikube addons enable ingress
Then verify:
minikube addons list
59. Enable Ingress
For local Kubernetes practice, Ingress is very useful.
Run:
minikube addons enable ingress
Check:
kubectl get pods -n ingress-nginx
You can then practice:
Browser
   |
   v
Ingress
   |
   +------ Service
             |
             +--- Pod
             +--- Pod
This is especially useful for learning real-world Kubernetes traffic flow.
60. Check Minikube IP
Run:
minikube ip
Example:
192.168.x.x
This is the IP associated with the Minikube environment for your selected driver.
61. Check Minikube Node
Run:
kubectl get nodes -o wide
This gives additional information such as:
Internal IP
OS image
Kernel
container runtime
62. Docker Images and Minikube
Suppose you have:
docker build -t myapp:v1 .
Depending on the Minikube driver, your host Docker environment and Minikube's container runtime may not automatically share images.
A convenient Minikube workflow is:
minikube image load myapp:v1
Then use:
image: myapp:v1
inside your Kubernetes manifest.
Check the image:
minikube image ls
This is very useful when developing your own Dockerized applications locally.
63. KIND Image Workflow vs Minikube
KIND
Build:
docker build -t myapp:v1 .
Load:
kind load docker-image myapp:v1
Deploy:
kubectl apply -f deployment.yaml
Minikube
Build:
docker build -t myapp:v1 .
Load:
minikube image load myapp:v1
Deploy:
kubectl apply -f deployment.yaml
This is an extremely useful workflow for local Kubernetes development.
64. Important: Don't Use latest Everywhere
Beginners often write:
image: myapp:latest
While this can work, explicit versions are easier to manage.
Prefer:
image: myapp:v1
Then later:
image: myapp:v2
This makes deployments and rollbacks easier to understand.
65. Understanding Kubernetes Contexts
This is extremely important when using both KIND and Minikube.
Suppose you have:
KIND
Minikube
Your kubectl can communicate with only one selected context at a time.
Check:
kubectl config get-contexts
Example:
CURRENT   NAME
*         kind-kind
          minikube
Switch to Minikube:
kubectl config use-context minikube
Switch to KIND:
kubectl config use-context kind-kind
Always check:
kubectl config current-context
Beginner mistake
You think you are working on Minikube:
kubectl apply -f app.yaml
But your current context is actually:
kind-kind
Your application gets deployed to KIND.
So always check:
kubectl config current-context
before important operations.
66. A Simple Mental Model
Remember this:
KIND / Minikube
       |
       v
Kubernetes Cluster
       |
       v
Control Plane
       |
       v
Nodes
       |
       v
Pods
       |
       v
Containers
And:
kubectl
   |
   v
API Server
   |
   v
Kubernetes Objects
67. Important Kubernetes Commands for Your Local Cluster
See Nodes
kubectl get nodes
See Pods
kubectl get pods
See Pods in all namespaces
kubectl get pods -A
See Deployments
kubectl get deployments
See Services
kubectl get services
See ReplicaSets
kubectl get replicasets
See namespaces
kubectl get namespaces
Detailed information
kubectl describe pod <pod-name>
Logs
kubectl logs <pod-name>
Execute shell inside a Pod
kubectl exec -it <pod-name> -- /bin/sh
If the image contains Bash:
kubectl exec -it <pod-name> -- /bin/bash
68. Useful KIND Commands
List clusters:
kind get clusters
Create cluster:
kind create cluster
Create named cluster:
kind create cluster --name dev
Create using config:
kind create cluster --name dev --config kind-config.yaml
Delete cluster:
kind delete cluster
Delete named cluster:
kind delete cluster --name dev
Load image:
kind load docker-image myapp:v1
Get help:
kind --help
69. Useful Minikube Commands
Start:
minikube start
Start using Docker:
minikube start --driver=docker
Status:
minikube status
IP:
minikube ip
Dashboard:
minikube dashboard
Service URL:
minikube service <service-name> --url
Stop:
minikube stop
Delete:
minikube delete
Profiles:
minikube profile list
Addons:
minikube addons list
Image loading:
minikube image load myapp:v1
70. Common KIND Problems
Problem 1 — kind: command not found
Check:
which kind
If nothing appears, KIND is not in your PATH.
Check:
ls -l /usr/local/bin/kind
Then:
kind version
71. Problem 2 — Docker Is Not Running
Check:
docker ps
If Docker isn't available, check:
systemctl status docker
Start it:
sudo systemctl start docker
Enable it at boot:
sudo systemctl enable docker
Then:
docker ps
72. Problem 3 — Docker Permission Error
If you see:
permission denied
try:
sudo usermod -aG docker $USER
Then:
newgrp docker
Test:
docker ps
73. Problem 4 — KIND Cluster Already Exists
You may see a message that a cluster already exists.
Check:
kind get clusters
If you want to recreate it:
kind delete cluster
Then:
kind create cluster
74. Problem 5 — kubectl Is Connected to the Wrong Cluster
Run:
kubectl config current-context
Then:
kubectl config get-contexts
Switch:
kubectl config use-context <context-name>
For example:
kubectl config use-context minikube
75. Common Minikube Problems
Problem 1 — Driver Problem
Run:
minikube start --driver=docker
Then check:
minikube status
76. Problem 2 — Not Enough Resources
Minikube's basic documentation currently recommends at least:
2 CPUs
2 GB free memory
20 GB free disk
for its basic setup. (minikube)
Check your resources on Linux:
nproc
Memory:
free -h
Disk:
df -h
77. Problem 3 — Minikube Is Stopped
Check:
minikube status
If stopped:
minikube start
78. Problem 4 — Start From Scratch
If your local Minikube environment becomes confusing:
minikube delete
Then:
minikube start --driver=docker
This creates a fresh cluster.
79. KIND vs Minikube — Which Should a Beginner Learn?
My recommendation:
Start with Minikube if:
You are completely new to Kubernetes and want:
Simple installation
Beginner-friendly commands
Dashboard
Local development
Easy experimentation
Learn KIND if:
You want:
Multi-node clusters
Kubernetes testing
CI/CD testing
Fast cluster creation/deletion
Kubernetes networking practice
Local automation
More realistic multi-node simulations
80. For DevOps Engineers
If your goal is DevOps / Cloud / Kubernetes, I recommend learning both.
A good learning sequence is:
Docker
   |
   v
kubectl
   |
   v
Minikube
   |
   v
Kubernetes Objects
   |
   +---- Pod
   +---- Deployment
   +---- Service
   +---- ConfigMap
   +---- Secret
   +---- Volume
   +---- Namespace
   |
   v
KIND
   |
   v
Multi-node Kubernetes
   |
   v
Kubernetes Networking
   |
   v
Ingress
   |
   v
Storage
   |
   v
RBAC
   |
   v
Helm
   |
   v
Monitoring
   |
   v
Cloud Kubernetes
   |
   +---- EKS
   +---- AKS
   +---- GKE
81. Complete Beginner Practice — Minikube
Let's put everything together.
Start:
minikube start --driver=docker
Check:
minikube status
Check nodes:
kubectl get nodes
Create Deployment:
kubectl create deployment nginx --image=nginx
Check:
kubectl get deployment
Check Pods:
kubectl get pods
Expose:
kubectl expose deployment nginx \
  --type=NodePort \
  --port=80
Check:
kubectl get service
Get URL:
minikube service nginx --url
Open the URL in your browser.
82. Complete Beginner Practice — KIND
Create cluster:
kind create cluster --name dev-cluster
Check:
kind get clusters
Check context:
kubectl config current-context
Check nodes:
kubectl get nodes
Create Deployment:
kubectl create deployment nginx --image=nginx
Check:
kubectl get pods
Expose:
kubectl expose deployment nginx \
  --type=ClusterIP \
  --port=80
Check:
kubectl get service
Port forward:
kubectl port-forward service/nginx 8080:80
Open:
http://localhost:8080
83. KIND + Docker + Kubernetes Workflow
This workflow is extremely important for DevOps.
Developer
    |
    v
Write Application
    |
    v
Dockerfile
    |
    v
docker build
    |
    v
Docker Image
    |
    v
KIND
    |
    v
kind load docker-image
    |
    v
Kubernetes Deployment
    |
    v
Pod
    |
    v
Container
This is very similar to the workflow you will eventually use in CI/CD.
84. Minikube + Docker + Kubernetes Workflow
Developer
    |
    v
Application
    |
    v
Dockerfile
    |
    v
Docker Image
    |
    v
minikube image load
    |
    v
Kubernetes Deployment
    |
    v
Pod
    |
    v
Container
85. Real DevOps Example
Imagine you have a Flask application.
Your project:
flask-app/
│
├── app.py
├── requirements.txt
├── Dockerfile
└── deployment.yaml
Build Docker image:
docker build -t flask-app:v1 .
For KIND:
kind load docker-image flask-app:v1
For Minikube:
minikube image load flask-app:v1
Then your Kubernetes Deployment:
apiVersion: apps/v1
kind: Deployment

metadata:
  name: flask-app

spec:
  replicas: 2

  selector:
    matchLabels:
      app: flask-app

  template:
    metadata:
      labels:
        app: flask-app

    spec:
      containers:
        - name: flask-app
          image: flask-app:v1
          imagePullPolicy: IfNotPresent

          ports:
            - containerPort: 5000
Deploy:
kubectl apply -f deployment.yaml
Check:
kubectl get pods
Now you have:
Kubernetes
    |
Deployment
    |
ReplicaSet
    |
+-----------+
|           |
Pod         Pod
|           |
Flask       Flask
86. Why This Matters for DevOps Interviews
You may be asked:
What is KIND?
Simple answer:
KIND stands for Kubernetes IN Docker. It allows us to run Kubernetes clusters locally by using containers as Kubernetes nodes. It is useful for development, testing, and CI environments.
What is Minikube?
Minikube is a tool that runs a local Kubernetes cluster on a developer's machine. It is especially useful for learning Kubernetes and local application development.
KIND vs Minikube?
KIND is very convenient for creating lightweight, multi-node Kubernetes clusters using container nodes, while Minikube focuses heavily on making local Kubernetes learning and development easy.
Why use Kubernetes locally?
A local cluster allows us to learn and test Kubernetes without requiring multiple cloud servers.
87. Important Difference: Docker vs Kubernetes
Beginners often confuse these two.
Docker
Docker primarily helps us:
Build
Package
Run
Ship
containerized applications.
Kubernetes
Kubernetes helps us:
Deploy
Manage
Scale
Heal
Network
Update
containerized applications.
Think:
Docker
  |
  v
Container
  |
  v
Kubernetes
  |
  +--- Pod
  +--- Deployment
  +--- Service
  +--- Scaling
  +--- Self Healing
88. What Should You Practice Next?
Once KIND and Minikube are working, don't stop at:
kubectl get pods
Start building real Kubernetes knowledge.
Practice in this order:
Beginner
Pod
Deployment
ReplicaSet
Service
Namespace
Labels
Selectors
Intermediate
ConfigMap
Secret
Volumes
PersistentVolume
PersistentVolumeClaim
StatefulSet
DaemonSet
Jobs
CronJobs
Networking
ClusterIP
NodePort
LoadBalancer
Ingress
DNS
NetworkPolicy
Security
RBAC
ServiceAccount
Roles
RoleBindings
Secrets
SecurityContext
Advanced
HPA
Helm
Kustomize
Monitoring
Prometheus
Grafana
Logging
CI/CD
89. Final Architecture to Remember
After completing this tutorial, keep this picture in mind:


                    Developer
                        |
                        | kubectl
                        v
               +-------------------+
               |   API Server      |
               |  Control Plane    |
               +---------+---------+
                         |
          +--------------+--------------+
          |                             |
          v                             v
     Worker Node                    Worker Node
          |                             |
       kubelet                       kubelet
          |                             |
       +--+--+                       +--+--+
       |     |                       |     |
      Pod   Pod                     Pod   Pod
       |     |                       |     |
    Container Container           Container Container
With KIND:
Laptop
  |
Docker
  |
Kubernetes Node Containers
  |
Kubernetes Cluster
With Minikube:
Laptop
  |
Minikube
  |
Driver
  |
Kubernetes Cluster
  |
Pods
90. Complete Command Cheat Sheet
Docker
docker --version
docker ps
docker images
docker build -t myapp:v1 .
kubectl
kubectl version --client
kubectl get nodes
kubectl get pods
kubectl get pods -A
kubectl get deployments
kubectl get services
kubectl get namespaces
kubectl describe pod <pod>
kubectl logs <pod>
kubectl config current-context
kubectl config get-contexts
kubectl config use-context <context>
KIND
kind version
kind get clusters
kind create cluster
kind create cluster --name dev
kind create cluster --name dev --config kind-config.yaml
kind load docker-image myapp:v1
kind delete cluster
kind delete cluster --name dev
Minikube
minikube version
minikube start
minikube start --driver=docker
minikube status
minikube ip
minikube dashboard
minikube service <service> --url
minikube addons list
minikube profile list
minikube stop
minikube delete
minikube image load myapp:v1
91. Final Comparison
| Area | KIND | Minikube |
|---|---|---|
| Beginner learning | ⭐⭐⭐⭐ | ⭐⭐⭐⭐⭐ |
| Easy setup | ⭐⭐⭐⭐⭐ | ⭐⭐⭐⭐⭐ |
| Multi-node practice | ⭐⭐⭐⭐⭐ | ⭐⭐⭐⭐ |
| Local development | ⭐⭐⭐⭐⭐ | ⭐⭐⭐⭐⭐ |
| CI testing | ⭐⭐⭐⭐⭐ | ⭐⭐⭐⭐ |
| Dashboard | — | ⭐⭐⭐⭐⭐ |
| Docker integration | ⭐⭐⭐⭐⭐ | ⭐⭐⭐⭐⭐ |
| Kubernetes experimentation | ⭐⭐⭐⭐⭐ | ⭐⭐⭐⭐⭐ |
| Recommended for beginners | Yes | Yes |
| Recommended for DevOps labs | Yes | Yes |
92. My Recommendation for a Beginner
If you are completely new to Kubernetes:
Step 1
Learn Docker first.
Docker
Step 2
Install:
kubectl
Step 3
Start with:
Minikube
Learn:
Pod
Deployment
Service
Namespace
ConfigMap
Secret
Volume
Step 4
Then learn:
KIND
Create:
Control Plane
+
Multiple Workers
Step 5
Practice:
Ingress
Storage
StatefulSet
DaemonSet
RBAC
NetworkPolicy
Step 6
Build a real project:
Frontend
   |
Nginx
   |
Backend
   |
Database
Then migrate it from:
Docker Compose
       |
       v
Kubernetes
This is one of the best ways to understand Kubernetes as a DevOps engineer.
Conclusion
Running Kubernetes locally is one of the best ways to learn Kubernetes without immediately spending money on cloud infrastructure.
Minikube is excellent for beginners because it provides a simple local Kubernetes environment and useful developer-focused features.
KIND is excellent when you want to create lightweight Kubernetes clusters, especially multi-node clusters, and use them for development, testing, and CI workflows.
The most important thing is not simply installing the tools.
You should understand what is happening behind the commands:
Docker
   ↓
KIND / Minikube
   ↓
Kubernetes Cluster
   ↓
Control Plane
   ↓
Nodes
   ↓
Pods
   ↓
Containers
Once you understand this flow, Kubernetes becomes much easier to learn.
For your next Kubernetes lab, take the same NGINX example and start learning:
Pod
 ↓
Deployment
 ↓
ReplicaSet
 ↓
Service
 ↓
Ingress
 ↓
ConfigMap
 ↓
Secret
 ↓
PersistentVolume
 ↓
StatefulSet
That is where Kubernetes starts becoming really interesting. 🚀
Official References
KIND Official Documentation — Installation, cluster creation, multi-node clusters and image loading. (Kind)
Minikube Official Documentation — Installation, requirements, drivers and starting a local cluster. (minikube)
Minikube Start Command Reference —
minikube startoptions and configuration. (minikube)

🚀 Complete Learning & Career Resources | 2027–2028
A curated collection of learning resources for AI, Data Analytics, Python, Data Engineering, Cybersecurity, Cloud, Networking, Finance, Digital Marketing, Project Management, DevOps and Generative AI.
📚 Learn → 🧪 Practice → 🛠️ Build → 🐙 Share → 🚀 Grow









🌟 About This Repository
Welcome to the Complete Learning & Career Resources Repository! 🚀
This repository is designed as a centralized learning hub for students, developers, QA engineers, DevOps engineers, cloud learners, cybersecurity enthusiasts, data professionals, project managers, business professionals and anyone interested in continuous learning.
The goal is simple:
Learn → Practice → Build → Document → Share → Grow
Instead of searching for useful resources again and again, this repository brings them together in one place.
🎯 What You Will Find Here
🤖 Artificial Intelligence
🧠 Generative AI
📊 Data Analytics
🐍 Python
⚙️ Data Engineering
☁️ Cloud Computing
🌐 Computer Networking
🔐 Cybersecurity
⚙️ DevOps
📋 Project Management
💰 Finance
📈 Digital Marketing
🧩 Business Analysis
🚀 Career Development
🎓 Professional Learning
🛠️ Project Ideas
📚 Learning Roadmaps
📊 Repository Overview
| Category | Resources |
|---|---|
| 🤖 AI Courses | 15 |
| 🔵 Google Courses | 15 |
| 🟣 IBM Courses | 10 |
| 🔥 Best Courses 2027–2028 | 21 |
| 🌟 Learning & Career Resources | 14 |
| 📖 Personal Resources | 4+ |
📚 Table of Contents
🤖 AI Courses
🚀 Explore AI fundamentals, Python, AI infrastructure, Generative AI, AI governance and specialized AI applications.
| # | Course | Link |
|---|---|---|
| 1 | AI For Everyone | Start Course ↗ |
| 2 | AI Python for Beginners | Start Course ↗ |
| 3 | AI Infrastructure and Operations Fundamentals | Start Course ↗ |
| 4 | Generative AI for Human Resources (HR) Professionals | Start Course ↗ |
| 5 | AI Fundamentals | Start Course ↗ |
| 6 | AI for Healthcare | Start Course ↗ |
| 7 | AI Applications in Accounting and Finance | Start Course ↗ |
| 8 | AI Governance and Privacy Professional Certification (AIGP) | Start Course ↗ |
| 9 | Ethics and Governance in the Age of Generative AI | Start Course ↗ |
| 10 | Hands-on quantum error correction with Google Quantum AI | Start Course ↗ |
| 11 | AI-Powered Higher Education | Start Course ↗ |
| 12 | Modern Project Leadership: Agile, AI, and Beyond | Start Course ↗ |
| 13 | AI-Powered Business Analysis: Excel, KPIs & GenAI | Start Course ↗ |
| 14 | AI in Law: Research, Risk, and Legal Drafting | Start Course ↗ |
| 15 | Generative AI for Project Managers | Start Course ↗ |
🔵 Google Courses
🌐 Explore Data Analytics, AI, Cybersecurity, Networking, Cloud, Digital Marketing and Project Management.
| # | Course | Link |
|---|---|---|
| 1 | Foundations: Data, Data, Everywhere | Start Course ↗ |
| 2 | Ask Questions to Make Data-Driven Decisions | Start Course ↗ |
| 3 | Prepare Data for Exploration | Start Course ↗ |
| 4 | Agile Project Management | Start Course ↗ |
| 5 | Project Initiation: Starting a Successful Project | Start Course ↗ |
| 6 | AI Fundamentals | Start Course ↗ |
| 7 | Foundations of Digital Marketing and E-commerce | Start Course ↗ |
| 8 | Play It Safe: Manage Security Risks | Start Course ↗ |
| 9 | The Bits and Bytes of Computer Networking | Start Course ↗ |
| 10 | Analyze Data to Answer Questions | Start Course ↗ |
| 11 | Automate Cybersecurity Tasks with Python | Start Course ↗ |
| 12 | Architecting with Google Compute Engine | Start Course ↗ |
| 13 | AI for Writing and Communicating | Start Course ↗ |
| 14 | From Likes to Leads: Interact with Customers Online | Start Course ↗ |
| 15 | AI for Data Analysis | Start Course ↗ |
🟣 IBM Courses
💙 Explore SQL, Python, Data Analytics, Deep Learning, RAG and Generative AI resources.
| # | Course | Link |
|---|---|---|
| 1 | Databases and SQL for Data Science with Python | Start Course ↗ |
| 2 | RAG and Agentic AI Capstone Project | Start Course ↗ |
| 3 | Excel Basics for Data Analysis | Start Course ↗ |
| 4 | Introduction to Data Analytics | Start Course ↗ |
| 5 | Data Visualization and Dashboards with Excel and Cognos | Start Course ↗ |
| 6 | IBM AI Foundations for Business | Start Course ↗ |
| 7 | AI Capstone Project with Deep Learning | Start Course ↗ |
| 8 | Python Project for Data Engineering | Start Course ↗ |
| 9 | Building Generative AI-Powered Applications with Python | Start Course ↗ |
| 10 | Vector Databases for RAG: An Introduction | Start Course ↗ |
🔥 Best Courses 2027–2028
🎯 A broader collection covering AI, Data, Python, Finance, Cybersecurity, Marketing, Networking, Management and Data Engineering.
| # | Course | Link |
|---|---|---|
| 1 | AI For Everyone | Start Course ↗ |
| 2 | Foundations: Data, Data, Everywhere | Start Course ↗ |
| 3 | Ask Questions to Make Data-Driven Decisions | Start Course ↗ |
| 4 | Prepare Data for Exploration | Start Course ↗ |
| 5 | Financial Markets | Start Course ↗ |
| 6 | Agile Project Management | Start Course ↗ |
| 7 | Play It Safe: Manage Security Risks | Start Course ↗ |
| 8 | Project Initiation: Starting a Successful Project | Start Course ↗ |
| 9 | AI Fundamentals | Start Course ↗ |
| 10 | Analyze Data to Answer Questions | Start Course ↗ |
| 11 | Foundations of Digital Marketing and E-commerce | Start Course ↗ |
| 12 | The Bits and Bytes of Computer Networking | Start Course ↗ |
| 13 | Sequence Models | Start Course ↗ |
| 14 | Federal Taxation I: Individuals, Employees, and Sole Proprietors | Start Course ↗ |
| 15 | Designing the Organization | Start Course ↗ |
| 16 | Game Theory | Start Course ↗ |
| 17 | Using Python to Access Web Data | Start Course ↗ |
| 18 | Viral Marketing and How to Craft Contagious Content | Start Course ↗ |
| 19 | Python Project for Data Engineering | Start Course ↗ |
| 20 | Value Chain Management | Start Course ↗ |
| 21 | Applying Data Analytics in Finance | Start Course ↗ |
🌟 Learning & Career Resources
💡 Additional resources for learning, career development, language learning, hosting, education and professional growth.
🗺️ Recommended Learning Roadmaps
Choose one roadmap according to your career goal. You don't need to learn everything at once.
🤖 AI Roadmap
AI Fundamentals
      ↓
Python Basics
      ↓
Mathematics & Statistics
      ↓
Data Fundamentals
      ↓
Machine Learning
      ↓
Deep Learning
      ↓
Generative AI
      ↓
Prompt Engineering
      ↓
RAG
      ↓
Vector Databases
      ↓
Agentic AI
      ↓
AI Applications
      ↓
Real-World Projects
      ↓
GitHub Portfolio